Quantcast
Channel: Dale's Wargames
Viewing all 135 articles
Browse latest View live

Warhammer Underworlds and the Games Workshop Marketing Machine

$
0
0
First off, this is not intended to be a review, but I will be talking about the subject game, its design, and its marketing model.
I was given a copy of Warhammer Underworlds: Nightvault by someone who got it as a gift. They opened the box, took one look at the miniatures that needed to be assembled and later offered it to me. "Sure" I said. Who doesn't want a free game?

I opened it later, looked at the model – they looked like a familiar sculpting style – looked on the back of the box and saw it was by Games Workshop, the dreaded sucker of souls and wallets, and I promptly put it on the shelf to collect dust. Nope. Not going to do it. Not going to get sucked into a mainstream money pit of a game. My days of Warhammer 40K and Warhammer Fantasy are over.

One day a video pops into my YouTube feed and it is about Warhammer Underworlds: Nightvault, so I decide to give it a watch. Several things immediately leap out at me.
  1. The game is played on a hex grid.
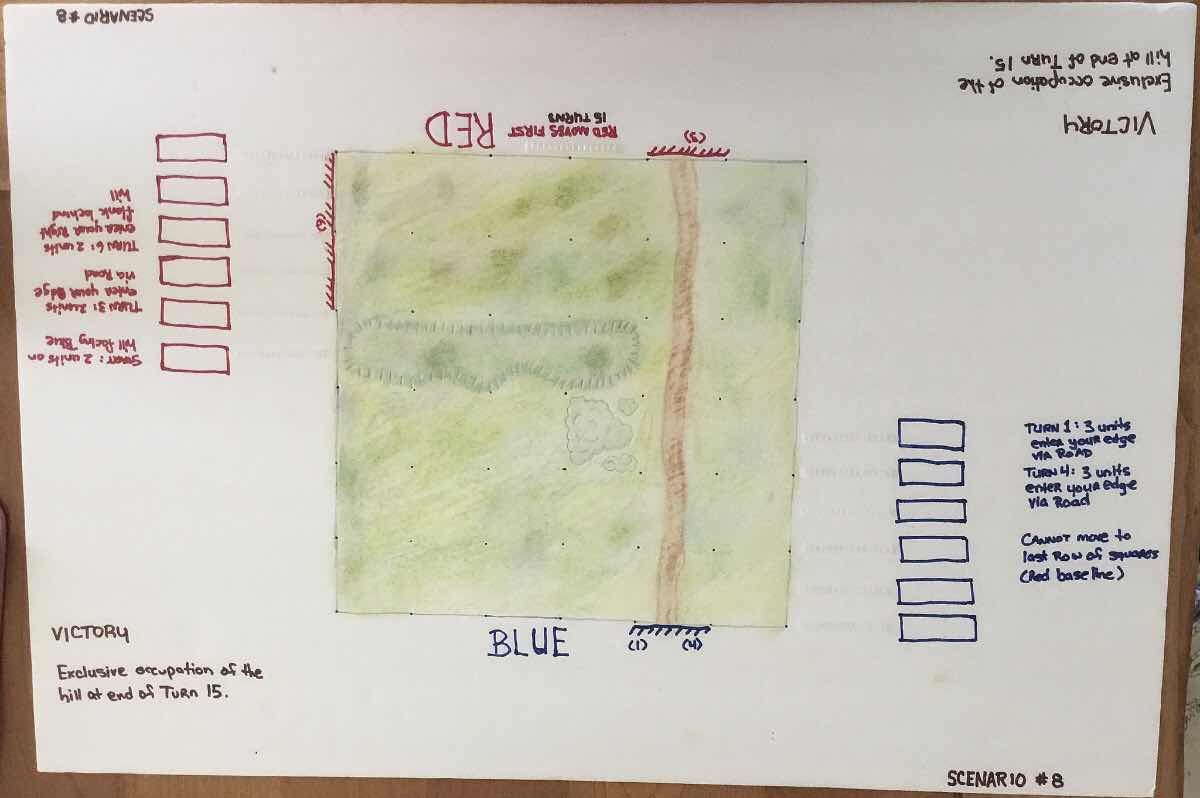
  2. The game is played on a small space (although some board configurations take more space than others) and can generally be played on a standard gaming convention or hobby store folding table. It will easily fit on your dining table.
  3. The dice have the combat resolution odds built in.
  4. The war band (faction) you play uses a set number and combination of figures, from three to nine figures. No futzing around with points, figure selection, or army composition. (As I found out later, you do customize your decks, however, so there is some futzing about before a game.)
  5. Each player has two decks and maintains a hand of cards from both decks, that are kept secret from the opponent. The Objectives deck provides the player with options to score points and the Power deck consists of upgrades (better sword, spells, and gear for your fighters) and "gambits" (think dirty tricks and "tactics" card that modify the combat in some way).
  6. The cards for your fighters have their stats and abilities clearly spelled out, so no requirements to reference rules.
  7. Games are fixed in length; think of it as a 12 turn chess match.
  8. Games play fast (about 30 minutes, once you get the hang of it) and chance (dice rolls and card play) has a large impact, so matches are best out of three games.
  9. The game plays very well with three and four players, not just two.
Honestly, so far this game looks like it scratches a lot of my itches (grid, small space, small figure counts, rules on cards, combat resolution built into the dice). People talk about Warhammer Underworlds (the official name of the game, Nightvault being one of two waves, the other being Shadespire) as a gateway game, but this is a tactically rich game, despite having relatively simple rules to play.

Games Workshop's New Marketing Model

Let's look at the fantasy lineup that Games Workshop is providing now. The old Warhammer Fantasyis no longer sold (although it is certainly played) and has been replaced by Age of Sigmar. If you want to play Age of Sigmar you can go out right now and legally download the rules and start playing with the figures you have. Games Workshop's idea was that a kid could go into the hobby shop, buy a $25 or $35 box of miniatures, and start gaming with only a few more pieces. Not like the old days where someone would have to buy an expensive rulebook, each player would need an army book, and then both people would need miniatures. (That is why the large, expensive box sets were so popular, as they were a "good deal" because it included the two sides and the army lists, as well as the rules.) Now, that kid can download the rules for free, download the "warscrolls" for free, and get to gaming.
No, Games Workshop has not gotten out of the business of selling rules – you can still buy the glossy hardback versions of all of this – but they have lowered the barrier for entry.
Back to Warhammer Underworlds. The starter sets contain everything you need for two players to start playing: the game boards, two war bands, dice, tokens, and cards. You can actually push-fit the miniatures together (no glue required) and the hobby shops near me that sell this line will lend you plastic cutters and a hobby knife to remove your miniatures from the sprue so you can start gaming right then and there. My first game was in a "Draft Tournament" at a hobby shop. They charged $15 as an entrance fee, gave you a random war band box ($30 retail value) to use in the tournament, and we all set about building our models and card decks in the first hour. It is a brilliant marketing move by Games Workshop to support these sort of tournaments and it shows you how cheap getting into this game can be.
So, if one person in a group has the starter set ($60 retail), you have two war bands, the boards, dice, and tokens. Some of my local stores have multiple copies on hand on their demo shelf. That allows people to invest as little as $30 getting a war band and getting started, either at a hobby shop with a demo set or with someone who owns the starter set. So, pretty cheap to get started.
Let's switch back to Age of Sigmar for a moment. So Age of Sigmar is the big brother army game using lots of models, but they also have Age of Sigmar: Skirmish so you can play smaller games with fewer models. No, those rules aren't free, but they are only $8. Using the core rules (free), the Skirmish supplement ($8), the warscrolls (free), and a few miniatures you can play that game pretty cheaply. Now for the connection: Games Workshop published free warscrolls for the war bands in Warhammer Underworlds so you can use those figures in your Age of Sigmar and Age of Sigmar: Skirmish games. Pretty damn smart. So I can buy a war band and use those miniatures for three different games (four, coming soon, as Games Workshop is releasing another themed Age of Sigmar game called Warcry which is at the skirmish level).
Back to Warhammer Underworlds. So, how does this game sustain itself such that there is a second wave of expansions and a third (Dreadfane) on the way? Remember that interesting twist, the game uses cards as a way of customizing your war band and how it plays? Yeah, that.

Warhammer Underworlds is a collectible card game with miniatures. Now before you stop reading, understand that there are two variants of "collectible card game". The first, which is the evil version, assigns probabilities to each card in how frequently they will appear in starter decks and booster packs, then randomizes the cards you find in those packages. Think Magic the Gathering. Many of these are branded trading card games because they follow the model of sports trading cards, but wrapping a game around the cards.

The second model is that all packages have a fixed set of cards, so there is no randomness to collecting, you just have to collect them all. And they way that Warhammer Underworlds gets you to collect them all is to include cards in with every war band. So to collect all of the cards, you have to buy all of the war bands at $30 a box or $60 a starter set. (There is also a set of cards not associated with any war band.) On top of that, there are now additional boards to collect. (Initially the game boards were only included in the starter sets.)

If you were to go all in, getting everything, that would be two starter sets at $60 each, ten additional war bands at $30 each, two additional boards at $25 each, the Leaders card expansion at $25, and dice for the factions at about $15 each. Mind you that the Shadespire starter set is out of print and the dice were limited items, so finding them for sale, or for sale at normal retail prices might be hard. Not counting the dice you are sitting just shy of $500 for the collection.

I, of course, being of the species that collects lead, pewter, plastic, and wood mountains, started collecting them, simply to complete the card collection, thinking it was required to make me "competitive". I watched so many games with people using cards I did not have ... oh the possibilities. "If only I had card X."

Ironically, I am not the only one that has spotted this ploy by Games Workshop. Not only are their deck builders out there, showing all the cards and which war band box they appear in, but there are virtual card players now that allow you to play cards with an app. This would allow you to build decks with cards you do not own, so would be another inexpensive way to go.

Okay, so I have laid out what I think is the largest negative out there, that if you have an obsessive collecting disorder, i.e. wargamer's OCD, then you have been warned. There is a way to mitigate that aspect, however.

That said this is a game that my wife has played with me (when she deigns to humor me) and due to its small footprint we can easily play on the dining room table, sitting down, so it saves my back. It uses a grid, to save on standing up to measure and reducing arguments. (Not that I win any arguments with my wife.) Maybe if there is interest, I will write more on it. As it stands now, I am a bit late to the train on this one. This came out more than a year about and although it is still getting support from Games Workshop, it is no longer the Flavor of the Month, so getting games takes some work.


One-Hour Skirmish Wargames and Close Combat

$
0
0
A recent comment on my One-Hour Skirmish Wargames Review blog post read:
"So maybe a close combat should be treated as firing – engage in one and the figure ends all action for the turn."

I suspect this is the authors intent. This is a shooting focused game and melee should not be so over powered.
Hey, I thought, I have John's email address. Why not simply ask the author his intent?
Hi Dale,

Yes, I intended that close combat ends a figures move for that phase.

Best wishes,
John
Well there you have it! Thanks to the Unknown blog post commenter. I agree that it is a good change also and does change the nature of the game considerably.

Kings of War Historical

$
0
0
It seems like it has been a while since I have posted, so I thought I would write up some thoughts on a game I played recently. (One of the few played with other people!)

Kings of War Historical

Kings of War Historical (KOWH) is a set of multi-figure based rules from Mantic designed to be simple, fast, using lots of figures and buckets of dice. A gaming buddy has been rebasing his Romans and Germans from single-figure based (used with movement trays for Hail Caesar) and KOWH is what he decided on using them for. You can download the free fantasy version of the rules here. The core rules are the same with KOWH changing some special ability names and giving you suggestions on how to classify your historical troops.

Our test game was pretty simple as it had no terrain and we just grabbed troops. There were four Roman heavy infantry bases (no pilums), two Roman skirmisher bases (javelin-armed), and one Roman cavalry base. Opposing them were four warrior bases, two skirmisher bases (bow-armed) and two cavalry bases.

The first concept you learn with KOWH is that units can be 1 or more bases. Basically, his models were 10 figures to a base for skirmishers and 20 figures to a base for heavy infantry and warriors. Units are either 10, 20, 40, or 60 models. If you have one 20-figure base as a unit, it is a 'regiment'. If you have two 20-figure bases, it is a 'horde'. To make things interesting, I decided to use my four bases of warriors as two hordes, while my opponent kept his as four regiments of heavy warriors. I put one skirmish unit on each flank and one cavalry unit outermost on each flank. My opponent, having only one each, put his cavalry on his right flank and his skirmishers on his left.


As you can see, a pretty simple setup. The Romans moved first, and due to the distance between the battle lines, the Germans struck first.

KOWH is very much an 'Alpha Strike' style of rules, meaning that you can move forward (5" with infantry, double that for cavalry, +1" for skirmishers) and shoot and melee and force the enemy to check morale all before they get a chance to respond. Fortunately, units do not generally die on the first hit, but hitting first is a distinct advantage.

Each unit has a set of stats that determine how well you fight. Your Melee and Ranged stat is stated as a die roll, e.g. 4+ on D6. This is the die roll needed to score a hit on your enemy if you are in melee or are shooting, respectively. Your Defense stat is also stated as a die roll, and that is the roll needed for to turn each hit made by the enemy into damage. For example, if your enemy's Melee stat is 4+ then they roll their dice and each 4+ scores a hit. They then roll a number of dice equal to the number that scored hits and and try to roll your Defense value (in this example, a 5+). Those that succeed are damaging hits and are applied to your unit, either indicating the hits with markers, or ticking off boxes if using a roster.

When a unit is damaged in combat it must check morale by rolling 2D6 and adding the number of accumulated hits, then comparing that to the unit's Nerve stat, which has two values; Wavering and Routing. Equal or exceed the numbers and the morale effect is applied. (Routing means the unit is removed.)

Generally speaking, your unit's size does not affect your Speed, Melee, Ranged, or Defense stats, but they do affect your Attacks (the number of dice you roll in Melee or Ranged combat), Nerve, and Points Cost. To give you an idea of how unit size might change stats, here is an example for an Archer unit.


Archers
Unit SizeSpeedMeleeRangedDefenseAttacksNervePoints
Troop (10)65+4+4+810/12115
Regiment (20)65+4+4+1014/16150
Horde (40)65+4+4+2021/23250

Note that having the flexibility of having two 20-figure units will cost you in points compared to one 40-figure unit.

Now that you can see sample stats, you can see why it is a buckets-of-dice game. My Warrior Hordes were throwing 24 dice for each attack! You can also see that when testing morale your units can take several hits before they disappear, although low and high rolls will definitely influence their staying power.

So, let's take an example combat in the game. My Warrior Hordes were throwing 24 dice in melee, hitting on a 4+ (12 hits on average), damaging the Roman Legionnaires on a 5+ (4 damaging hits on average). The Romans had a nerve of 16/18 (if I recall correctly), so with an average 2D6 roll of 7, they would rout on the third melee round, but quite possibly waver on the second.

The Roman Heavy Infantry, on the other hand, were throwing 15 dice (if I recall correctly) as they were a Troop and not a Regiment, hitting on a 4+, damaging on a 4+, also for about 4 hits. But the Germans had a Nerve of 22/24, so a possible rout on the fourth melee round, but more likely on the fifth.

That gives you a basic idea of the combat system. Movement is very simple in that everything is straight lines with a single pivot of up to 90º (unless standing still, then you can pivot any number of degrees). Differentiation in units and armies comes through the application of "special rules", much as you would find in Black Powder or Memoir '44.

I personally think you could easily convert this to a square grid (equal to one base in width) with a minimum of rules changes, especially as the rules are always trying to square up units and maintaining distances between units (friendly and enemy). Using a square grid as a space regulator is the perfect mechanism.

As for the game, the German cavalry crushed the skirmishers on their right flank, forcing the Romans to face spare units outwards. As the German cavalry on the left got the jump on the Roman cavalry, it defeated the Romans before it was defeated in turn, so the flanks simply enveloped the Roman center, eventually destroying it.

Conclusion

I liked the game. I would use a roster to tick off casualties, rather than use dice on the board as hit counters. (I prefer a cleaner board, if possible.) I would also prefer to use a square grid as almost every maneuver, other than straight forward, straight back, or turn to flank, were of little consequence to the game.

The game played fast – easy to play two games, one for playing each side once, allowing you to play unbalanced scenarios – and there were very few things that needed looking up, other than Stat values. I would definitely play it again on a smaller board with my 15mm DBA-based miniatures.

Gameboard for One-Hour Wargames

$
0
0
If you have been reading this blog for a while then you know I often game on boards that I make out of Elmer’s foam core boards. The smaller, cheaper ones that you can find readily available are about 30” wide by 20” deep. They take ink, colored pencil, chalks, and pastels well (although you probably want to seal it with matte varnish, especially if you use chalks), but if you use anything water-based, you will have to deal with warping.

Given my move to small board, grid-based gaming, these work pretty well for me.

The one thing that I like especially about Neil Thomas’ One-Hour Wargames is the scenarios. Although generally simple, I think too many gamers get bogged down in too much scenery. (Lots of scenery is a necessity for skirmish games, but you probably need to abstract a lot of that away if you are gaming at a higher scale, i.e. units are brigades, rather than individuals or fire teams.) Neil’s scenarios are very sparse when it comes to terrain. They remind me of the tactical exercises I used to game – where I would attack a woods or a house – until I understood the basics of tactics in whatever rules I was running.

Because the terrain in Neil’s scenarios is very sparse, and has no random element in its placement, making a gameboard for an often played scenario makes sense. Here is what mine looks like for Scenario #8 – Mêlée.

This is the view from the Red side. 


Although it is hard to see (I should probably paint them) there are little strips of plastic needlepoint ‘grating’ to the left of the red boxes. You move a peg from hole to hole, indicating how many hits have been inflicted. There are 15 holes, so you can either handle units with 15 or 16 hits. The red boxes each hold markers to indicate which unit each represents. 


At the bottom is another strip with 15 holes, which is the turn track. Given than Red goes first, the turn track goes on his side.

This scenario has special rules around unit placement, reinforcements, and unit entry points. You can find those rules to the right of the unit tracks. Finally, there is the victory condition, found in the lower left-hand corner, to remind you to focus on the objective.

Here is a view of the Blue side. It has the same basic setup as the Red side, with the details differing, as per the scenario. There is no turn track, however.


The first game I am going to run is using 15mm DBA units, which is why the squares are 2”. They will, however, represent 6” of table space in the game given that the recommended frontage of units is 6”. So one unit horizontally for each square. (I am still pondering whether to allow multiple units in a square. For DBA units, as long as they do not exceed a depth of 40mm, I should be good.)

I have been tinkering with an idea for One-Hour Wargames, but as I have not played it ‘straight’ yet, I am holding off right now. Everyone has ideas on how to make it better, but there is only one concept I wish to model. (Things like Elites, Large Units, etc. I think can be modeled as scenario rules.) My concept is Fresh Units. Basically, as a unit wears down in combat, it becomes less effective. Some of Richard Borg’s games reflect that by granting more dice in the attack when you have more blocks or figures in the unit. (Others, like Memoir ‘44 do not modify the roll at all. It seems like the larger the game scale, the more likely he will allow units to roll full dice until they are destroyed.)

Rolling multiple dice and adding them to count the hits would make units disappear faster, so that would throw off things like scenario length, reinforcement rates, and so on. My idea is simple, units with: 0-4 hits would roll 2D6 and pick the highest; 5-9 hits would roll 1D6 (as normal); and 10-14 hits would roll 2D6 and pick the lowest. Because I use pegs and holes to record hits it would be easy to color code the strip to indicate whether the unit is Fresh (yellow), Worn (orange), or Exhausted (red).

So, a unit that is worn down a bit fighting through the first line, would (on average) not hit as hard as the unit in reserve in the second line. This mechanic would also have the side effect of encouraging the use of reserves. I think few games accomplish that.

One-Hour Wargames

$
0
0
I have avoided reviewing the rules One-Hour Wargames (OHW) by Neil Thomas for quite a while for one simple reason: just reading through the rules it felt like they were not for me. If you have read through any of my reviews you know some of the factors that I favor, but you might have also noticed that my tastes are getting "simpler". The question is: is OHW too simple?

OHW has three main sections: discussions about how warfare changed over time; wargaming rules on how to represent those changes over time; and wargames scenarios. If you read enough comments on OHW you will quickly see that many of them are about the scenarios, and generally they are all positive. I will touch upon that, but mostly I want to focus on the rules, as this is the area that I avoided all this time.

Rules Overview


OHW is not one set of rules as much as it is a set of core wargaming rules with nine variants to reflect the different periods of warfare that the book covers: Ancients, Dark Ages, Medieval, Pike and Shot, Horse and Musket, Rifle and Sabre, American Civil War, Machine Age, and the Second World War.

Let's start with the basics. A typical game is played on a 3' by 3' board with units occupying 4" to 6" of frontage, using six units per side. Each period has four different unit types that are broken down into one predominant type and three supporting types. Which unit type is the predominant one, what types are allowed, and what the characteristics of the unit types are is what provides the period's 'feel'.

Army composition is broken down into 3-4 units of the predominant type, and 0-2 units of each of the supporting types, up to a maximum of six units. Scenarios in the book can modify the army size – some armies only have four units – and there are random tables to determine exactly how many of each type you receive for a battle. Note that, if you are playing the scenarios as the author intended, you will have random force composition and will not be allowed to select your army composition. However, nothing stops you from choosing nor will anything 'break' if you do.

As a side note, this 'four unit type' model fits with his other book Wargaming Nineteenth Century Europe 1815 - 1878, which uses ten and five unit armies, so there is nothing to stop you from using those random force selection tables to include scenarios with those additional force sizes. Just consider that your board size may have to change.

Movement is fairly straightforward. There are three movement speeds – 6", 9" and 12"– and no changes due to terrain (other than +3" for road movement), turning, charging, interpenetration, etc. Terrain effects are largely impassable versus no effect on movement (by unit type). Turning is at the beginning and/or the end of the move (at only the beginning of a charge) and is an unlimited pivot on the unit's center point (limited to 45° for charges).

A key concept with these rules are that a unit can only move or shoot in a turn. There are no exceptions for skirmishers, vehicles, etc.

Shooting and Hand-to-Hand Combat are very simple. There is only one modifier to the die roll and that is a combat factor that applies to the unit type. For example Knights and Warbands roll a D6+2 while a Skirmisher rolls a D6-2, and so on. Shooting ranges are either 12" and 48", regardless of the period played. Combat is handled by the attacking unit (Shooting or Hand-to-Hand Combat) rolling a D6, adding their unit's modifier and inflicting that many 'hits' upon the enemy unit. When a unit has taken 15 hits it is eliminated and removed from the board.

There are a few modifiers to receiving hits. Having a terrain advantage can halve the number of hits received, as can having heavy armor (indicated by the unit type). Contacting the enemy unit's flank or rear will cause double the number of hits. Other than that, there are no modifiers.

So that is movement and combat, the core elements. There is no command and control, nor is there any morale. 15 hits and out is about it.

Where's the Beef?!?


I have to admit, when I first read the rules, that was my thought. Way too simple. I mean, I understand Neil Thomas' passion for stripping down rules, getting rid of complexity, and emphasizing the need to get to a decision in a reasonable amount of time, but this seemed like a bit much. So I passed judgment without actually playing the rules, skipped to the back and read the scenarios, and consoled myself that at least that provided enough value for money.

It was while I was skimming over my library that I saw an old title by Charles Stewart Grant entitled Programmed Wargames Scenarios that I decided to revive an old project: trying to develop a programmed opponent that I could write down, send to another player, and they could use that program to game solo. You can read about my thoughts and experiments on that idea in the links below.

I am still working through the idea, but the core of the solution was to try and scope to programmed opponent to a specific side or a specific scenario using a specific set of rules. (Charles S. Grant took a broader approach and thus had to keep his programming at a strategic level.) I liked the scenarios in OHW, so it made sense to use one of them, hence my last blog post's project of creating a gameboard for scenario #8. I had also resolved to (finally) actually try the OHW rules and I felt that playing the scenario would help me get a feel for it, so why not use the rules that were intended for it? Two birds with one stone, and all that.

The Game


I decided to break out my DBA medieval armies and give it a go. (The gameboard was designed for units of that size, after all. Plus I could test out my system for tracking hits. It worked great.) I was going to play it straight ... except I wanted to use a grid. (So sue me.)

I threw the forces forward and tried various actions to see their effect and I realized that the game was surprisingly tactical. Moves mattered. Exposing your flank got you crushed. Knights hit hard, but they did not automatically run over units. This was Chess with a random die roll. This did not play out as I expected, where both sides would line up, and you would simply throw dice adding up number with no thought or enthusiasm. The guy with the better die rolls eventually won – as is true with most games – but there were definitely consequences for bad decisions.

Afterwards, I wrote a blog post on my Solo Battles blog about my ideas for using OHW for a programmed opponent. One of the asks was for others to try the program out and provide feedback. A gaming buddy asked me to write a programmed opponent for the same scenario, but for the Dark Ages variant of the rules.

The Rules Variants


So, I started looking at the Dark Ages variant and I noticed how Neil Thomas modeled the changes to warfare through time. In my initial reading I thought the model only changed subtly. "In this period X unit type gets +2, but it is the Y unit type that gets that bonus in the other period."

No, actually it was not really subtle. Basically a unit type determines the combination of: movement speed; offensive power; defensive power; and frequency of appearance in an army. 
  • As stated previously, a unit type can either have a 6", 9", or 12" movement speed. 
  • Offensive power is represented in rolling a D6-2, D6, or D6+2 for combat, whether you can attack in Hand-to-Hand Combat and/or Shooting Combat, and – if you can shoot – what the range of that attack is (either 12" or 48").
  • Defensive power is represented by taking all or just half of the number of hits your enemy rolled against you.
  • Predominant unit types have a chance for more units in the army (3-4), than support types (0-2).
Again, it is this combination of factors that distinguish the unit types, and it is the combination of allowable unit types that distinguishes the period's army.

I should note that, although the author talks about playing armies from one period against an army of another period as a possibility, there are no changes to the rules about technological superiority of one period over another. In this regard OHW is like DBA philosophically in that an army's power is relative to other armies within the same period. (Of course, this idea is ignored in DBA much of the time...)

Rules Ratings


Using the review system from before, here are the game ratings for One-Hour Wargames (OHW).

Drama– do the rules create tension during play?

Generally speaking, this game is about attritional combat with no effect on units until the unit is destroyed and removed from the board. As the average roll is 3.5 hits and a unit takes 15 hits before it is destroyed, units will generally break after five turns, or one-third of the game length.

Drama comes from the scenario, how you match up units, and how you maneuver units in order to concentrate combat power to wear down your enemy faster than they wear you down.

These rules rate 2 out of 5 in Drama.

Uncertainty– are there enough elements that introduce uncertainty into the game?

The two primary mechanics that create uncertainty are: the roll to determine your army composition and the combat rolls made throughout the game. There are no other significant chance elements. That is okay though, as the author has simply stripped away other chance elements and boiled them down to these two. If the math is the same does it really matter if it takes three rolls (to hit, to wound, and to save) versus one roll? Some people would say yes, but I am not one of them. I am skeptical of the probabilities in most game rules anyway.

These rules rate 3 out of 5 in Uncertainty.

Engaging– do the rules allow the player to make meaningful decisions that lead to consequences?

This was actually the area that surprised me the most. I thought that the game would be a die-rolling contest, more so than other rules, and that the games would degenerate into troops lined up beating on one another until someone broke. (Which, by the way, describes many DBA games.) Given the core rule that you can only move or shoot, and that you cannot break away from hand-to-hand combat, when you choose to engage is critical, especially as combats are multi-turn affairs. When you commit, you commit.

If you can out-maneuver your opponent and hit their flank or rear (or they make a mistake in their maneuvering) you can eliminate units very quickly in comparison to frontal attacks. Additionally, if you can control advantageous terrain, you can take very little damage from your opponent, allowing you to tie them up twice as long as normal. Simply throwing your troops in headfirst is not likely to be a winning tactic.

These rules rate 4 out of 5 in Engaging.

Unobtrusiveness– do the rules get in the way?

No. Obtrusive have lots of exceptions for special cases. These rules have few such special cases to worry about.

These rules rate 5 out of 5 in Unobtrusiveness.

Heads Up– are the rules playable without frequent reference to a quick reference sheet?

Basically you need to memorize the stats for four unit types, but given that both sides use the same types, this is not really an issue. Stats may change as you switch from period to period, but within the period being played, everyone is the same.

The majority of my test game was played without the rules being nearby. Once you get the hang of the rules, you will only access them to refresh on stats before you start a new game.

These rules rate 5 out of 5 in Heads Up.

Appropriately Flavored– do the rules 'feel' like they represent the period or genre being played?

This is where the author's work shines. I admit that I have not played all of the periods, but just looking at two period, Dark Ages versus Medieval, you can see how they would not only play very differently, but appropriately. Using these periods as an example, let's look at the predominant unit type for each period: Shieldwall Infantry versus Mounted Knights. Infantry move 6", are D6 in hand-to-hand combat (only), and take half hits. Infantry versus Infantry will inflict two hits per turn, requiring eight turns to break the other unit. Knights move 12", are D6+2 in hand-to-hand combat (only), and take all hits. Knights versus Knights will inflict 5.5 hits per turn, requiring three turns to break the other unit. That simple comparison will tell you that Medieval games will probably not require the full 15 turns to determine a winner while the Dark Ages games might well see more units surviving until the bitter end.

Despite the seeming generic nature of the rules, these really feel like they are trying to emulate the period they are designed for.

These rules rate 4 out of 5 in Appropriately Flavored.

Scalable– can the rules be scaled up or down – in terms of figures or number of units played – from a 'normal' game?

As the number of figures in a unit plays no role in the game – only the number of units matter – I won't consider that a factor. That said, these rules are designed to be played quickly and in a small space. They probably could scale up, and even have multiple players per side, but that is not the intent. (I will certainly give it a try some time.)

The main factor that might provide issues are tracking hits for each and every unit. Dice used to register the number of hits sometimes get picked up, knocked about, left behind when the unit moves, etc. Plus, they just look plain ugly on the table. Marker look a little better, but with 15 hits per unit, you are going to have a lot of them unless you with use markers with numbers, or have some system where one color counts as 5 and another counts as 1. Even so, they too can get left behind.

These rules rate 2 out of 5 in Scalable.

Lacks Fiddly Geometry– do the rules require fiddly measurements or angles?

The only angles in this game are 45º, used as the maximum turn before a charge and the arc of fire for most units that can shoot. Generally, most players can agree on that.

Measurements are in 3" increments, so again not too much of an issue. Plus, these rules are easy to convert to a grid.

These rules rate 4 out of 5 in Fiddly Geometry.

Tournament Tight™ Rules– are the rules clear and comprehensive, or do the players need to 'fill in the blanks'?

Let me start by saying that my preference is towards tighter rules, where everything is spelled out clearly by the author, not looser rules where the author leaves certain mechanics up to the individual players, gentlemen's agreements, and a roll of the die where agreements cannot be found. So a high value means 'tight' and a low value means 'loose'. If you like looser rules, subtract my rating from '6' and that would probably be your rating!

Although the author defines the different periods and unit types pretty sharply, he clearly intends that players develop their own modifications to suit their taste. An example in the Dark Ages variant discusses that to represent Viking invaders you could swap the Infantry units for Warband units, while Frankish force might better be modeled by swapping the Infantry units for Cavalry units. That said, I think it is not a good idea to muck about with the modifiers too much, unless you think you have the math right. Even adding a +1 to the combat die roll allows that unit to move in and take out a normal unit (on average) without being broken.

There are a number of things unexplained, such as what qualifies as sufficient contact for hand-to-hand combat. (At least it has simple rules for multiple units attacking a single unit straight.) But, for Neil Thomas rules, these are more clearly defined than all of his others. There aren't many edge cases when the rules are so simple.

These rules rate 3 out of 5 in Tournament Tight™ Rules.

Solo Suitability– do the rules have elements conducive to solo play?

There are no hidden elements to the game so that alone usually grants the rules high solitaire suitability.

Generally solo game mechanisms need to address the following questions:
  • Which units can act in a turn? In OHW all units can act in a turn, so this question is moot.
  • Which unit should act next? As OHW has all units move, then shoot, then conduct hand-to-hand combat, timing is generally not an issue. But, there is no mechanic for answering this question.
  • What action should a unit take? Generally this is the most important question that the solo gamer wants answered. Again, there is no mechanic for answering this question.
What makes OHW suitable for solo gaming is the lack of complexity in its rules. This makes for easier decisions, which in turn makes it easier to graft on solo gaming mechanics that will not significantly alter the dynamics of the game.

There is a chapter on solo wargaming, but it is largely a rehash of older mechanics from Featherstone, Grant, and Asquith that involve adding chance elements into the game to simulate decision making and the fog of war.

These rules rate 4 out of 5 in Solo Suitability.

Component Quality– are the components provided made with quality?

This is a new rating, meant primarily for board games and books, which addresses the quality of the physical components.

These rules come printed and as a Kindle eBook. I have both. The book is paperback with quality binding. However, it is not a lay-flat binding. Given the thinness of the book (just over 100 pages) it is capable of having a lay-flat binding. The quality of the paper and the legibility of the type screams quality. At $20 on Amazon, I think this book is a good value. Even when it was just for the scenario material, but I was happy with my purchase.

These rules rate 4 out of 5 in Component Quality.

Summary


There is much of this book that I did not cover, such as the differences between the periods, the scenarios themselves, and the notes on running campaigns. For the most part I review rules, not books. These rules are very accessible, in my opinion clear and understandable (more so when you break out the figures and try them), will possibly lead to disputes about terrain and 'just out' cases, and can provide a decisive game in a reasonable amount of time.

Will everyone like these rules? No! Every rules author must decide where to add detail and where to abstract them away and players will not always agree on where that line should be drawn. If you think that there is "no way" you could play a set of rules that have only four unit types, you probably won't like OHW, especially the Second World War variant.

If you like Neil Thomas' rules but find yourself tweaking them, you will probably not like these rules until you finish tweaking them. 

(Surprisingly) Recommended.

Wargaming Mechanics Blog and Square Grids

$
0
0
I am embarrassed to say that it has taken me all this time to find Phil Dutré's blog Wargaming Mechanics. There is some really good material out there, not the least if which is his analysis on using a square grid. I am not going to copy any of his material here as I have not asked for permission, but if you are interested in gaming on a square grid, this post is a must-read.

The main question his post answers is: should I allow diagonal movement in a game using a square grid? Phil lays out numerous methods for counting and compares the distance moved to  the "true" Euclidean distance from the center point of the starting square. In his second blog post on the matter he comes to the conclusion that "we don't really want a measurement procedure, we want a counting procedure", meaning a means of counting squares. (The second post makes the distinction clearer, as Phil discusses moves like the Knight's Move, the Zebra's Move, and the Camel's Move.)

What this answered for me is that my previous counting method, which he calls "at most 1 diagonal move allowed", is sub-optimal. I much prefer his "1-2-1-2 alternation" method. It is simple and a much better representation of the "correct" distance. (Again, go to Phil's blog to see the diagram.)

When I put it into practice, I had another revelation. Rather than placing the units in the square, I placed the center point of the unit on a dot I normally use to define the corners of the square. This allowed me to more easily to use the counting method Phil described (in my case, from dot-to-dot rather than from empty space-to-empty space). Also, because units straddled two squares (rather than being within a single square), this made for much cleaner unit pivots. Below is an example that I used for my small space gaming grid conversion of Neil Thomas' 19th Century rules.

How to pivot within a square.
As you can see, the center point of the unit moves when you are confined within a square, whereas if you pivot on a point the center point stays fixed.

This also solves another issue, which is that I generally only allow a unit to face the flat side of a square and not the vertices. With this improved counting method, there is little reason not to allow the additional four facings. (You still have to deal with contact for hand-to-hand combat, but that is another subject.)

Tip of the hat to Phil and his blog. I would also tip my hat to the follower of this blog - I look at your profiles every so often to see the other blogs you follow - that led me to Phil's blog, but I forgot who it was.

If you like examining game mechanics like I do, Phil's blog is highly recommended. If you know of any other blogs like this, please let me know in the comments.

OHW Austro-Prussian War Variant

$
0
0
After playing a few times with One-Hour Wargames (OHW) using the Medieval variant I had a hankering to blow off the dust from my 1866 Austrians and Prussians and give the Rifle and Saber variant a go. I have used these troops in the past using Neil Thomas'Wargaming Nineteenth Century Europe (WNCE) rules (on a grid, of course) and really enjoyed them. WNCE is crunchier than OHW (what isn't, after all), but not too crunchy.

As you might expect, the Rifle and Saber variant is very generic. The 'problem' with using them to represent the Austro-Prussian War (also known as the Seven Weeks War, War of 1866, Unification War, Fraternal War, and the German War) is that this period represents the transition from assault to firepower doctrine for infantry tactics and from smoothbore to rifled technology for artillery. Even more so, the Austrians clung to the assault doctrine with their rifled musket-armed infantry and rifled artillery, while the Prussians had adopted the breechloading rifle decades ago, but still had smoothbore artillery. Basically Prussian infantry was technically superior to Austrian infantry while Austrian artillery was technically superior to the Prussian artillery. (Austrian cavalry was generally superior too, not that it mattered much.)

Here are the basic stats in the Rifle and Saber variant.

Unit TypeHand-to-Hand Combat Shooting Combat
InfantryNot AllowedD6+2
SkirmishersNot AllowedD6
CavalryD6Not Allowed
ArtilleryNot AllowedD6

Of note, Cavalry that does not defeat its enemy in hand-to-hand combat must retreat 6"; it does not stay engaged in melee.

To reflect the ability of the breechloader to produce significantly more firepower than a rifled musket – in WNCE breechloaders produce twice the number of dice over rifled muskets – it is given the D6+2 rating, while rifled musket-armed infantry get D6. Because the Austrians were armed with the rifled musket and fought in columns and relied upon the bayonet, their shooting is further reduced to D6-2, but they gain the ability to charge into hand-to-hand combat (against all except Cavalry), where they get D6+2.

Bronze rifled artillery is granted the 48" range and D6 rating listed in the rules while Steel rifled artillery (Krupps) will be granted a longer 60" range, but no other changes. Smoothbore artillery, however, will be granted a D6+2 rating at 12" or less (to reflect their superior canister) and a D6-2 rating at up to 36". The shorter range reflects their additional vulnerability to rifle fire (rather than increasing the Bronze rifled artillery range).

Unit TypeHand-to-Hand Combat Shooting Combat
Prussian InfantryNot AllowedD6+2
German InfantryNot AllowedD6
Austrian InfantryD6+2D6-2
SkirmishersNot AllowedD6
CavalryD6Not Allowed
Rifled ArtilleryNot AllowedD6 (Bronze 48" / Steel 60")
Smoothbore ArtilleryNot AllowedD6+2 (12") / D6-2 (36")

In WNCE there is one other huge differentiation between breechloader-armed and musket-armed infantry: the former can lay down will they fire and reload while the latter do not. This grants breechloader-armed infantry a saving throw, even while in the open. I decided to give Prussian Infantry and Prussian Skirmishers to count as in cover (take one-half hits), regardless of the terrain they are in. Note that this means that Prussian Skirmishers in woods are still only one-half casualties, not one-quarter casualties, as you cannot count cover twice.

You might be thinking that the Prussians have a huge advantage over the Austrians, and you would be right. But, if you have played them in WNCE you know that is the way Neil Thomas modeled it in those rules.
Just as a comparison between OHW and WNCE, in WNCE a full unit of Prussians roll 8 dice, require a 4+ to hit, and the Austrians get no save. A full unit of Austrians roll 5 dice, require a 6 to hit, and the Prussians get a 5+ save. That is inflicting 4 hits per turn versus 0.5 hits, respectively. Prussians have 8 times the firepower. In OHW a unit firing D6+2 would eliminate an enemy in 3 turns, while a unit firing D6-2 would eliminate a unit taking one-half casualties in 15 turns. Prussians therefore only have 5 times the firepower. That is further offset by giving the Austrian infantry the ability to charge Prussian infantry (and skirmishers and artillery, but not cavalry) and inflict equal casualties.

Against German infantry, Prussians roll 8 dice, require a 5+ to hit, and the Germans get no save. The Germans get 4 dice, require a 5+ to hit, and the Prussians get a 5+ save. That is 2.64 versus 0.88 hits per turn, or the Prussians delivering 3 times the firepower. In OHW, again the Prussians would eliminate a unit in 3 turns while a German unit would eliminate a unit taking one-half casualties in 8 turns. Again, that gives the Prussians less of a firepower advantage over the Germans in OHW than it does in WNCE.

Test Game

I decided to play Scenario #8 (Melee) from the OHW rules. I have been playing a lot of this scenario lately as I am trying to prove to myself that playing one particular scenario over and over does not have to be boring or tedious, and that changing periods really helps keep the scenario 'fresh'.

At first I thought I would play one side programmed, but I quickly dispensed with that idea as I was not really sure what a good plan would be, especially with the Austrians as defenders. Given that the Austrians still fall under the assault doctrine, I thought it would be interesting to have them attack.

I rolled for the Prussians and received: three Infantry, one Skirmisher, and two Cavalry. For the Austrians I rolled three Infantry, two Skirmishers, and one Cavalry. I decided to switch out one of the Austrian Skirmishers for Artillery largely because I only have one Skirmisher unit for each side and I wanted to try the artillery rules out.

The Austrian Attackers
The Prussian Defenders

If you are wondering why the miniatures look 'funny' it is because they are made from beads and hot glue.

Turn 1


I decided to put two of my Prussian Infantry on the hill to defend. That would give them the ability to take one-half casualties from shooting (their natural ability) and also from hand-to-hand (defending uphill), so they should be very hard to dislodge, allowing the off-board reinforcements time to arrive and either hold the hill, or repel the Austrians that had gained the heights.

Meanwhile, the Austrians brought on their Artillery and two Infantry units.

End of Turn 1
By the way the Generals (round bases) play no role in the game and are for aesthetics. Also, I am using a gridded board (squares) with units centered on the point rather than within a square. Movement is done by counting each point moved as 3", with diagonal moves counting as 3" for the first diagonal, 6" for the second, and 3" for the third (the 1-2-1-2 counting method).

Also of note is that I am using John Acar's 3-hits method for OHW. Generally, I think this is an interesting idea, and I like that John shows the math, but I am concerned that I may get a result where a unit is destroyed in a single turn to a lucky roll.

In game terms this means that a D6-2 attack rolls 1D6, a D6 attack rolls 2D6, and a D6+2 attack rolls 3D6 with each 5+ scoring a hit (double casualties scores on 3+ and one-half casualties scores on a 6).

Turn 2

The Prussians maintain their same position on the hill, however the right unit pivots in order to get a bearing on any Austrian infantry advancing up the hill. Meanwhile the Austrians flank left and right, trying to maneuver their infantry into position so they can attack. Meanwhile the artillery stays out of range and starts bombarding the infantry, inflicting one hit (out of three).


End of Turn 2

Turn 3


It is at this point that I notice a flaw with my game board. The hill is too long. Although it is hard to see, there is a dot on the left end of the hill, indicating that there is an open uphill position. Because I did not move the Prussian Infantry on turn 2, the Austrians can gain the hill. To try and block the maneuver, the Prussian Infantry both march to the left. This also allows the right-most Infantry to get out of the line of fire of the Austrian Artillery.

The Prussians bring on their first reinforcements, the two Cavalry regiments, from the road entrance. The Prussian Hussars swing wide on the left, outside of the firing arc of the Austrian Infantry, while the Prussian Cuirassiers move towards the right end of the hill.

Prussian Turn 3
As expected, the Austrians charge the hill. Because they get a D6+2 attack in hand-to-hand, they get to roll 3D6, so it is possible that the can wipe the Prussian Infantry in a single turn. All they have to do is roll three 6's ...

Austrians Charge Up the Hill
They almost did it, scoring two 6's. But, given they did not succeed in eliminating the unit, they retreat 6" back. Meanwhile , the Austrian Infantry faces off against the Prussians uphill, while the artillery swings around to the Prussian right flank.
Honestly, I was not quite sure what to do with the Artillery unit. The woods block line of fire to the hill and eventually the advancing Austrian infantry would also. The alternative was to pivot to the left and threaten the Prussian Cavalry that was now threatening our flanking Infantry. What would you have done?
End of Turn 3

Although the Austrian Infantry is exposed to a flank attack, next turn more Austrian reserves will arrive via the road. The lead unit is itself a Cavalry unit, so it should be able to keep the Prussian Cavalry at bay while the Austrian Infantry continues to attack the hill.

Turn 4

The Prussian Hussars attack the Austrian Infantry from behind while the Prussian Infantry fire at it from the heights. The fire missed completely, probably indicating that the charged rattled them and they are still trying to reform, but the Hussars inflict two hits. Again, not enough to eliminate them, so the Hussars retreat. The Prussian Infantry on the hill fire down on the Austrians at the foot of the hill and inflict heavy losses.

Prussian Turn 4
The Austrian Infantry charge up the hill and inflict the single hit needed, gaining a foothold on the hill. Although it looked like the Austrian Infantry at the foot of the hill is shooting, they actually charged up the hill, fought in hand-to-hand (inflicting one hit) and then retreated back down.

More Austrian reinforcements enter the board and the Artillery slides right to get a line of fire on the hill.

End of Turn 4
As an aside, I like this effect of charging units 'bouncing off' of units they do not defeat in hand-to-hand. Aesthetically, it looks and feels right.

Turn 5


Big turn for the Prussians as the Hussars ignored the threatening Austrian Cavalry and charged the Austrian Infantry on the hill, wiping them out. Further, the Prussian Infantry finish off the Austrian Infantry at the foot of the hill. Meanwhile, the Prussian Cuirassiers gallop over the hill, ready to charge the Austrian Artillery.

Prussian Turn 5

Given that the Prussian Hussars were outside of 45º of the Austrian Dragoons front, they cannot charge, so they ascend the hill, taking the open position. (Note that the Prussian Hussars are facing away, so they cannot charge the Austrian Dragoons next turn either. So the Austrians have the upper hand, even if they cannot immediately take advantage of it.)

The Austrian Jagers (Skirmishers) advance into the woods, ready to pour fire into flank of the Prussian Hussars.
The most important decision is what to do with the Artillery. The Prussian Infantry on the hill need one more hit. The Artillery get 2D6 and needs a '6' on either die to inflict that remaining hit. Alternately, they could pivot so that they face the Prussian Cavalry about to hit it on its flank. Which move would you do?
I fired with the Artillery at the vulnerable Prussian on the hill and, unfortunately, miss.

End of Turn 5

Turn 6


Finally, the final Prussian reinforcements arrive. The final Infantry unit move to ascend the hill, plugging the gap to the right end. The Prussian Jagers (Skirmishers) move towards the weakened Prussian Infantry on the hill, should they fail to hold.

The Prussian Cuirassiers charge the Austrian Artillery, hitting them in the flank, inflict one hit, and bounce off.
2D6 inflicting double casualties (hit on a 3+) and only one hit! Note that in this period, even when you hit the enemy's flank, if you do not defeat the unit you retreat from hand-to-hand combat. This also means that defending units do not get a free pivot to engage a flanking unit as they are no longer engaged.

Prussian Turn 6

Despite the fact that the Austrian Dragoons charged the Prussian Hussars frontally while the Jagers fire at them from the flank, no hits are inflicted on the Hussars. The Dragoons retreat off of the hill. Meanwhile, I have the same decision with the Artillery and cannot resist the odds; I fire at the Infantry on the hill and finally eliminate them.

End of Turn 6

Turn 7


The Prussian Cuirassiers again charge the flank of the Austrian Artillery and again inflict only a single hit, forcing them to retreat. They only have one more chance to take out the Artillery before it will have pivoted and be able to fire upon them.

The Prussian Hussars could have charged the Prussian Dragoons, but instead chose to simply make a stand at the end of the hill. The Prussian Dragoons will only inflict one-half casualties charging uphill. It won't be until next turn that I realize that it was a bad move.

Prussian Turn 7

On the left the Austrian Dragoons charge uphill against the Hussars, while the Jagers continue to pour fire into their flank. Again the Jagers miss, but the Dragoons inflict a hit before retreating.

The Austrian Infantry also charge up the hill and attack the Prussian Infantry, but fail to inflict a hit, forcing them to retreat back down the hill.

The Artillery decide that they will be slowly killed if they keep firing at enemy on the hill, so they pivot to face the Prussian Cuirassiers. It may be too late though.

End of Turn 7

Turn 8

The Prussian Hussars stupidly stand at the end of the hill and do nothing while the Jagers move up to face off against the Austrian Jagers. The Prussian Cuirassiers charge the Artillery and finally eliminate them while the Prussian Infantry fire at the charging Austrians, inflicting a hit upon them.

Prussian Turn 8
At this point, looking at the match-ups, the Austrian Cavalry hits with 2D6, but need a '6', while the Prussian counter with 2D6 needing a '5' or '6'. The Jagers firing at one another both use 2D6 and require a '6' to hit. Finally, the Austrians will use 3D6 when charging, but require a '6' to hit, while the Prussians firing will also get 3D6 and require a '5' or '6' to hit. So, in the three match-ups the Prussians will inflict twice the damage. The third match-up is even. Even worse, the Prussians have a Cavalry unit that is unchecked.

End of Game


By the end of the Prussian turn 10 it was obvious that the Austrian cause was lost. I realized that the Prussian Hussars needed to charge off of the hill against the Austrian Dragoons, otherwise they would eventually be destroyed by the relentless Dragoon charges. Although the Austrians had inflicted the first hit, the Prussians won as they always retreated back up the hill and this got the benefit of defending uphill.

The Prussian Infantry on the hill also had the upper handed was able to eliminate the Austrian Infantry charging up the hill. The defensive quality of the hill just could not be overcome.

Prussian Turn 10

Summary


APW scenarios are hard to play in WNCE because Neil Thomas models the advantage of the breechloader as being so significant over the rifled musket. Those that play late war ACW know how devastating the Union units with single-shot breechloaders and repeating rifles can be, so it is not really that surprising. However, in the ACW it is usually only a unit or two that the Confederates have to deal with; here the Austrians have to deal with the entire enemy infantry force with such a firepower superiority.

I view periods like this as similar to the historical scenarios you find when playing Memoir 44. Those scenarios tend to be won by the side that won historically. When we played Memoir 44 as a tournament you basically had to play the scenario twice; once as each side. The player that scored the best over the two games won the round. I could see doing the same with playing the APW using OHW.

One reason why I think OHW might be a good ruleset for this period is that the games are quick, so playing it twice might not be so problematic. All in all, I think toning down the math of WNCE as I did here makes the Austrian side less dismal to play. Of course, the only way I can prove that is to play the scenario again, with the Austrians defending the hill.

American War of Independence Variant for One-Hour Wargames

$
0
0
I have a lot of painted American War of Independence (AWI) figures laying around – some based singly, some based for DBA-style armies, some not based at all – and I really love the Southern Campaign, but I haven't played a lot of it lately. The last outing with the figures was using them for Tin Soldiers in Action, which are rules I also enjoy. That said, I am becoming more enamored with One-Hour Wargames (OHW) because of its simplicity, ease of setup, and the ability to bring a game to a decision in a reasonable amount of time. Combine that with well-tuned scenarios that mesh with the game rules and you have a good system, even if it ends up not being your primary rules system. (Sometime, you just need something crunchier. "Sometime you feel like a nut, sometimes you don't!")

AWI game using DBA-style rules and my first gameboard

AWI Warfare

Not wanting to start a war on how the AWI was fought, I nonetheless have to model how I think it went. That is hard because how things played out in the Northern campaigns went quite differently than in the Southern Campaign. The latter had more elite troops and militia troops on both sides in addition to having much smaller numbers. If I had to choose, I would say that this variant is modeling the Southern Campaign.
For my Canadian and UK readers please feel free to substitute my use of the term "Patriots" for "Rebels", "Traitors", or whatever you feel is appropriate. I don't use the term "Americans" for a variety of reasons, least of which is that we weren't quite that yet.

Unit Types

As Neil Thomas does, it is best to start with the unit types first. Starting with the Horse and Musket variant as our base, what is wrong with Infantry, Skirmisher, Artillery, and Cavalry?

Artillery

Let's take a look at the artillery composition in a few battles in the Southern Campaign.

BattleBritish/LoyalistPatriot
Cowpens2 three-poundersNone
Guilford Courthouse1-2 six-pounders and 2 three-poundersTwo batteries of 2 six-pounders
Camden4 guns7 guns
King's MountainNone ?None ?
Hobkirk's HillNoneThree six-pounders

Clearly, there was not a lot of artillery available. But it is noteworthy that Lord Rawdon, for example, decided to attack at Hobkirk's Hill because he was told by a Continental deserter that the Patriot forces had no artillery. Believing that the Continental artillery was still miles away, he was convinced it was time to attack. The fire from that artillery contributed to Lord Rawdon's defeat and retreat from the battle.

Although there was not much artillery, it did play a role in some of the battles. Thus, when an army rolls for its composition, it may only receive one Artillery unit. If it rolls two the second unit is exchanged for an Infantry unit for the British army and a Skirmisher unit for the Patriot army.

An Indian or Indian/Loyalist army converts all rolled Artillery units to Skirmisher units, as does the Patriot player fighting against an Indian or Indian/Loyalist army.

Cavalry

There is a recurring belief that: there was no cavalry in AWI battles; there was cavalry, but it was only used operationally; or that there was a small bit of cavalry, but the terrain was so bad that it was ineffective. In the South, especially due to the longer distances at play, mounted operations were much more prevalent. Not only did cavalry play a role operationally, but they also had a battlefield role. At Guilford Courthouse, for example, we see elements of the British Legion under Banastre Tarleton, but we see the 1st and 3rd Continental Dragoons under Lieutenant Colonel Washington, Lee's Legion, and even some North Carolina militia cavalry. At Cowpens we see the British Legion, the 17th Light Dragoons and Tory Scouts/Guides under Alexander Chesnee, while the Patriots have elements from the Continental Light Dragoons, South Carolina State Cavalry, Virginia State Dragoons, North Carolina State Dragoons, South Carolina ”Guides”, Militia Volunteers under Benjamin Jolly, North Carolina Militia under Captain Mordecai Clark, and South Carolina Militia under Thomas Young.

Like the artillery, when rolling for army composition, an army may only receive one Cavalry unit. If it rolls two the second unit is exchanged for an Infantry unit.

In Indian or Indian/Loyalists versus Patriot battles, all Cavalry units rolled for either force are converted to Skirmisher units.

One might argue that, as the cavalry was classified as "light", it should not hit as hard in combat. I counter that argument with the reduced number of bayonets that infantry had in this theater, and that units tended to operate in looser formations, making even bayonet-wielding units less effective against cavalry.

Skirmishers


I would consider the Patriots would be allowed one Skirmisher unit (if any are rolled as being present) to be classified as rifle-armed, granting it an 18" range.

Skirmisher units in an Indian or Indian/Loyalist army may charge into hand-to-hand combat against Patriot Infantry and Skirmisher units. They roll D6-2 in hand-to-hand combat.

Infantry


If you read With Zeal and With Bayonets Only then you will certainly gain the impression that British infantry can and should be allowed to charge into hand-to-hand combat as the Patriots frequently fled from charges in several battle descriptions. In fact, what is notable in most commentaries is when the Patriots do not run due to being charged. If you follow that line of thinking then that really must be modeled.

One thing to note is that the charge seems to have rarely led to actual casualties. What it did was dislodge the Patriots from their positions and force them to fall back. (There were some exceptions, of course.)

To reflect this tendency for Patriot infantry to run from charges, British, German, and Loyalist Infantry units may charge Patriot Infantry and Skirmisher units. They roll D6 in hand-to-hand combat.
    All Infantry units rolled for an Indian force are exchanged for Skirmisher units, i.e. the only troop type allowed for Indian armies are Skirmisher units. Infantry units in Indian/Loyalist forces are not converted as the Infantry units are considered Loyalist militia.

    Summary of Changes


    The Charge Moves rule is amended to allow charges by some Infantry and Skirmisher units, as indicated above. None of the other rules in that section are modified, including the prohibition on attacking an enemy unit with more friendly unit each turn (the Limited Engagement rule).

    The Measure Range rule is amended by allowing Rifle-Armed Skirmisher units a range of 18".

    The Hand-to-Hand Combat rules are amended to allow combat by some Infantry and Skirmisher units, as indicated above. The Assess Casualties rule is amended by allowing eligible Infantry units to roll D6, and eligible Skirmisher units to roll D6-2, in hand-to-hand combat. The same Terrain and Flank or Rear Attacks rules apply, as written.

    The Retreat rule is amended to handle the cases for retreat when eligible Infantry and Skirmisher units are attacking.
    • After a round of combat, if British Infantry fails to destroy the Patriot unit, the Patriot unit retreats 6" after the combat is resolved, ending the move facing the British unit. The only exception to this is if the Patriot unit were defending a hilltop, town, or some form of fortification, in which case the British unit retreats 6", as per cavalry.
    • After a round of combat, if the Indian Skirmisher fails to destroy the Patriot unit, the Indian unit must retreat 6", as per cavalry.
    The Square Formation rule cannot be used in this variant; it is not an option.

    The Army Lists


    For your convenience, here are the army composition tables.

    British, German, or Loyalist Army

    Unit Type
    Die RollInfantryArtillerySkirmisherCavalry
    14101
    23120
    34011
    44101
    54110
    64011

    Indian/Loyalist Army

    Unit Type
    Die RollInfantryArtillerySkirmisherCavalry
    13030
    23030
    33030
    44020
    54020
    64020

    Indian Army

    Unit Type
    Die RollInfantryArtillerySkirmisherCavalry
    10060
    20060
    30060
    40060
    50060
    60060

    Patriot Army

    Unit Type
    Die RollInfantryArtillerySkirmisherCavalry
    13111
    23120
    33021
    44101
    54110
    64011

    Patriot Army (versus Indian or Indian/Loyalist)

    Unit Type
    Die RollInfantryArtillerySkirmisherCavalry
    13030
    23030
    33030
    44020
    54020
    64020

    I need to test all of this out. I haven't yet as I am basing a sufficient number of figures to make up the forces. I am thinking of going full size here, with 4" x 2" units for infantry, skirmishers, and cavalry, and 2" x 2" for artillery.

    Let me know what you think.

    Botched Relief Scenario in OHW and Other News

    $
    0
    0
    My gaming buddy Shawn and I were able to get two games of One-Hour Wargames (OHW) in today (in two hours, no less) using some of my old medieval DBA troops. We decided to play Scenario 28: Botched Relief and, let me tell you, this is a very interesting scenario. Lots of choices to make and very quirky, although a simple design. Both games were very much until the end. (Okay, on game two you could do the math and figure out that Red was not going to inflict enough damage, but it was still a very exciting game.)

    Botched Relief


    The scenario notes indicate that this scenario draws inspiration from the Battle of El Molino del Rey (1847) from the Mexican-American War of 1846-1848. A smaller force defeats a larger force largely because the larger force commits itself piecemeal.

    The Blue Army (attacker) is assaulting the town held by Red units. The majority of the Red Army, however, is on a hill on the flank, unengaged in the battle. Although the units appearing there are on the table, they cannot attack nor be attacked until they "activate". Additionally, only one unit can activate at one time. The second cannot activate until the first unit is eliminated, the third until the second is eliminated, etc. So although Red has 6 units to Blue's 4, Blue will never have more than 3 active at any one time.

    I brought my medieval troops so we were playing that variant, which is good because occupying the town is part of the victory conditions and all troops can enter towns in this period.

    I am not going to go for a blow-by-blow narrative in this battle report because I think, for the most part, people don't really like that. (Maybe it is just me.) What I like in battle reports are highlighting where key mechanics in rules come into play (especially when reviewing rules) and the key decisions made by the players. I am especially interested in the latter as I am trying to develop a series of programmed opponents specifically for OHW and its scenarios.

    Game 1

    I played Red and rolled up three Knights, one Archers, and two Levy. Darn! No Men-at-Arms to defend the town with. Blue Army was rolled up as three Knights and one Archers unit.


    1. The column of Blue Knights attacking up the road (not visible on the map, but trust me, it is there).
    2. The Blue Archers guarding the flank.
    3. The single Red Archers defending the town.
    4. The Red Knights defending the flank.
    5. The Red Knights coming in from the relief forces on the flank.
    The key decision the Red commander has, after finding out their force composition, is which unit types to put where. With Knights having 12" movement and hitting with D6+2, they could afford to be in the relief column; they have the mobility to get engaged with the enemy the quickest. The Archers have a 6" move and a 12" range, so it is possible that they too can have an impact in defending the town (or re-taking it). The issue with Archers is that they are D6-2 in melee and Blue Army, using the road, would be on them in turn 2. So I now question my choice of selecting them for my initial forces. Putting a Levy unit in there would have lasted as long, but inflicted more damage over the long run. The main point was that there was no Men-at-Arms unit (i.e. dismounted Knights) to put in. As they only take 1/2 damage, they have staying power.

    The first key rules moment came when I charge the Red Knights into the middle of the Blue Knights column.


    As you can (barely) see, I intentionally charged my Knights past the lead Blue Knights at the head of the road column and clipped the flank of the second unit. My intent was not to claim "flank attack" (and in fact I did not), but rather to tie up the road column from moving any further. This action, as you will see, brought up a lot of questions on how to interpret the OHW rules. I would like to hear some of your ideas on how you would interpret them.

    Despite my constant advocation of playing the Rules As Written, I find myself with OHW often "injecting" rules into the game that are not there, but are simply common conventions in other rules that I have played over the years. In this case I did not claim a flank attack because of the convention that you can only claim a flank attack if you are coming in more than 45º off of the front corner of the enemy unit, otherwise it is a frontal attack. It seemed cheesy to claim a flank attack when the charge clearly did not originate from the flank.

    There are three interesting things about this attack though. First, that you could charge past the first unit. This felt right because I was coming in from the side. Second, because the Knights were all jammed up together, there really was no way to engage the front face of the second Knights unit. Charging a unit in column would have hit its flank. Third, the charging unit only has corner contact. Nowhere does Neil Thomas espouse "squaring up" units in hand-to-hand combat in these rules.

    At this point, we had ruled it a frontal attack. Later we would both agree it should have been a flank attack, and thus caused double casualties.

    One other point of note is that the Blue Archers unit failed to pivot at the end of the last turn. You can just barely see the second Red Knights unit coming up on its flank. If it had pivoted, it would have been able to fire at those Knights, but as it was, they were either going to fire at my engaged Knights and eventually be taken in flank, or they would pivot – losing their opportunity to fire – but able to face off against the flanking Knights.

    That leads to another couple of questions: firing at units partially obscured and firing at units engaged in hand-to-hand combat.

    When it comes to line of sight, Neil Thomas is silent. Generally speaking I use a simple rule. If the right-front edge of my unit can draw a line to the closest center-point of the edge of the target unit and it does not pass through a unit or terrain, then do the same from the left-front edge, I allow the unit to fire. This means that units can fire into a melee if they meet the above rules. Here are some examples of what I mean.
    Allowed – Not Blocked by Unit or Terrain
    Not Allowed – Blocked by Terrain
    Is this how you play it?

    The next significant event was the relief Red Knights hitting the Blue Archers on its flank. It rolled a '6', adding '2' and then getting doubled (see the rules for the order of operations; adding and subtracting come before halving or doubling), resulting in the Blue Archers being run down in a single turn.


    Generally you think of OHW as an attritional game, given that it has 15 hits per unit, but you have to remember that hard-hitting units coming in on the flank can take out a fresh enemy unit 16% of the time!

    One of the rules in OHW is the inability of most units to interpenetrate other units. Generally only skirmishers can interpenetrate, or be interpenetrated by, other units. In the medieval variant there are no Skirmisher units, so there is no interpenetration allowed. By the way, I like this rule because, as Neil Thomas wrote in a Slingshot article of his rules (paraphrasing): I don't believe in command and control rules because I think players do a good enough job of getting in their own way. This next turn showed that concept neatly. The Knights on the road are all bunched up and now a threat on the flank has appeared much more quickly than anticipated.


    Although it is hard to see, the block of Knights on the left are actually two units, one behind the other. Due to the interpenetration rule the Knight unit in the rear cannot pivot. Interpenetration. Units may never pass through each other. So, it is not merely a matter of clearing the footprint of the friendly unit, one unit's footprint may not pass through another at all.

    This leads to a second issue. Although the rules never state it explicitly, movement is always straight. The following passage makes no sense otherwise. "Movement is depicted according to a simple model, whereby rapidity is reflected by faster movement rates rather than, for example, allowing some units to turn more rapidly than others. Turning is instead depicted in a simple manner, by pivoting units on their central point. This avoids the complexity of wheeling manoeuvres, where wargamers have to precisely measure the movement distance of a unit’s outer corner. The difficulties of turning are instead provided for by only allowing evolutions at the start and/or the end of a unit’s move, but not during it. This reproduces the historical effects, but makes the tabletop process much easier."

    That said, no word is mentioned of a unit backing up, reversing its movement. In the above situation the last Blue Knights unit would be stuck in place, unable to pivot, until the Knights unit in front of it moved forward or was eliminated. We decided to allow a unit to move straight forward or backward with no left or right drift. We felt the intent of the passage above was that there is no turning or oblique/drift in movement as the rules allow a free pivot both before and after the movement.


    Is that how you play it? Or would you have disallowed it because the commander inadvertently bunched his troops up? As it happened, this command and control issue still had a penalty. It allowed the Red Knights to get the jump on the Blue Knights, inflicting the first hit.

    The game ended with a Red loss. The Blue Knights eventually ground down the Red Archers while only taking 10 hits. The flanking Red Knights cut through all of the Blue Knights caught on the road, but in the end exposed its flank to the Blue Knights in the town. With the clock run out the Blue Knights turned around and re-entered the town long before the next relief unit could arrive and challenge ownership. Four determined units beat six cautious ones. It was a very close game.


    In hindsight I do think having a Levy unit in the town rather than the Archers unit would have resulted in a Red victory. That -2 in combat resulted in the loss of 6 hits on the leading Blue Knights, which would have destroyed them first.

    Let see how I fare as the attacker.

    Game 2

    Blue force rolled and got three Knights and one Men-at-Arms. Men-at-Arms (i.e. dismounted Knights) are notable in that they take 1/2 casualties due to their armor. Although they are slower, I wanted to have them attack the town. I wanted to make sure they survived the assault, leaving my Knights to clear the field. My strategy was going to be much different. (By the way, even though I did not plan it this way, I think the person that goes second as the attacker has the advantage as he can see what does and does not work.)

    Unfortunately, Red force rolled and also got one Men-at-Arms! In addition they received four Knights and one Archers unit. Here is how we deployed our troops.


    As you can see, Red went with the Men-at-Arms defending the town and the Knights protecting its flank. Red also chose the Archers unit as the unit from the relief force.

    I decided to attack on a broader front. Now that I knew I would be attacking Men-at-Arms in a town – they take 1/4 casualties – I knew that I would have to keep the flanking Knights and all of the relief forces off of my back to allow me as much time as possible to whittle down the defenders. Also, I knew that mathematically with him taking 1/4 casualties (armor and town defense) and me taking 1/2 casualties, I would have to get a second unit in there hitting him on the flank as soon as possible. So my plan was to use one Knights unit to engage his Knights unit, another to engage the Archers unit, and the final Knights unit to take the Men-at-Arms in flank.


    As you can see by the image above, I pushed my Knights all the way to the hill to take out the Archers. It did not matter much because the one shot they took was to the (white) Knights. But the problem was that I was now inflicting 1/2 casualties for attacking uphill. At the time I was not too concerned about that. In my game I only got one unit from the relief force activated until Turn 15 hit. If I could keep the relief forces pinned down as long as possible the second unit might not have enough time to take back the town, as happened to me. That said, my math was a little off. The Archers would inflict an average of 0.7 hits per turn (D6-2) while my Knights would still inflict an average of 3 hits a turn (D6+2 / 2). So as soon as I wiped out the Archers, he would have a Knights unit on my Knights' flank, which would likely wipe them out instantly.

    That said, all was playing out well. My Knights in the center had his engaged frontally and on flank. I missed blowing out his unit by one hit, however. Once that unit was eliminated, I had another interesting decision.


    The Archers had been inflicting a few good hits, so with the Red Knights in the center gone, my (white) Knights were free to slam into the Red Men-at-Arms defending the town. But what to do with the other Blue Knights unit? I knew that as soon the Red Archers collapsed the Red Knights immediately to their right would spring on the flank of my Knights attacking the hill. As they only had 5 hits it was possible that they could survive a flank charge (if the Red Knights rolled a 1-2). Even if they did not survive, I wanted to be in a position to immediately counter-charge their flank, if possible. So I moved my Knights forward to threaten any relieving Red Knights.

    My opponent thought it was a bad move. What do you think?

    As it turned out, the Archers collapsed, the Red Knights sprang on the flank of my Blue Knights, which were rolled over in a single charge. My Blue Knights then counter-charged (without getting a flank position), but were apparently still blown from the previous combat as they were rolled over by the Red Knights in turn. (There is something about Knights in the relief force being particularly effective as in both games they wrecked several units in succession.)


    However, by this time my (white) Knights had hit the Red Men-at-Arms in flank and helped eliminate them. (My troops had been getting very good rolls while his Men-at-Arms had been getting horrible rolls. After three turns at D6 / 2 they had only inflicted 5 hits on my Men-at-Arms!) So I turned my Knights around to intercept the Red Knights coming off of the hill. We were both at 8 hits ...

    I charged and rolled a '1', while he countered with a '4', leaving me with 1 hit remaining. That was enough to allow me to eliminate his Knights in the next turn. But that meant ... another fresh Red Knight was coming from the relief force. It charged off of the hill and took my last Knight unit out.


    I had 5 hits, but he was going to hit at D6+2 / 4 each turn, so basically a '1' to '4' was 1 hit and a '5' or '6' was 2 hits. His first hit he rolled a '1' ... and his swing on turn 15 ...


    Summary


    Two really great games, both with the attacker winning (as it was historically). OHW, like Memoir '44, due to its quick games and simplified play, lends itself to playing a scenario twice, once as Red and once as Blue, then seeing who did better overall across the two games. For this scenario, it was definitely  hard-fought draw, going down to the wire.

    It was interesting to see what kind of biases I brought from playing other rules, things I did not even question as to whether or not they were in the written rules (such as flank charges having to originate outside of the front 45º, or that there was no backwards movement defined). It was also interesting to see how close or far apart Shawn and I were on 'how things should be'. (Shawn is one of the few people that can stand playing with me, so I figure we must be closer in our gaming opinions than not.)

    The more I play OHW the more I am impressed with how rich a game whose combat mechanic is 'roll D6 to accumulate hits up to 15 then remove the unit' and how tightly designed the scenarios are. I have used the scenarios for other rules, but you always had to modify a few things (like forces, number of turns, etc.) so you definitely lost the sense of how tight these designs are.

    It was also really nice to be able to break out the old DBA armies, blow off the dust, and game with large units that had a better feel of 'mass'. Originally I had been playing using these armies with one base per unit, making units 40mm wide (instead of the recommended 4" to 6" wide). That allowed me to play on very small board (12" by 12", in fact). For this game I decided that I wanted to use units of the proper size, and using free movement no less! Each unit was 120mm wide (about 4.75") and with 15mm figures, it 'felt' great.

    I was digging through the closet looking for DBA knightly armies and found a whole (large) Norman force that I don't remember purchasing, and had definitely never played with. Shocking. But this game played so well, I can see a lot more medieval OHW games in the future.

    Gaming 2019


    I did not do one of those end of year posts outlining what I accomplished, etc., but I guess I will tack it on here.

    My last year was mostly wrapped around computer gaming, online education, and vegetating in front of the television. I got very little painting done, no big miniatures projects done, very few games played, and very few blog posts written. It really wasn't until December that I pulled myself out of that pattern and started gaming again. In my Solo Battles blog I published six posts in December, five posts here since Thanksgiving, but unfortunately none in my Wooden Warriors blog. (I have one coming up, however.)

    The biggest change to my gaming was trying to get into mainstream gaming rules, like Warhammer Underworlds and Star Wars: Legion (SWL). The former was largely unsuccessful because everyone around here has pretty much stopped playing it. The latter, however, seems to be just starting up in this area.

    So, why SWL? I am not a big Star Wars fan. I am not a big 'popular games' fan. The system is actually the kind I generally do not like (competition oriented; players like to min-max lists; points driven; scenarios are that in name only; figures are expensive; lots of tokens on the table; uses special, expensive dice; rules are 82 pages long; units have lots of special abilities, requiring cards to remember everything (but you will still forget a few); uses eyeballing line-of-sight and estimating the percentage of the figure exposed; and other such goodies. So why am I inflicting this upon myself? To be more social, to be honest. I have a very hard time meeting new people and asking if I can join in. As I get older I find that I get pickier, so my natural inclination is to solo game more. But solo gaming, well, is a lot of work. And it is lonely. I need to break out of that shell.

    Gaming 2020


    So, SWL will be more on the menu this year. Don't expect any battle reports anytime soon though. My painting of commercial figures has slowed down, especially as my eyes seem to have worsened. (I am getting my 'painting hand' back though.) I really don't like to do battle reports with unpainted figures and I can see it is going to take quite some time for me to paint all the figures I have purchased already. (Trust me, Citadel contrast paints can be a real time saver, if you use them correctly. Which is to say, not the way Citadel tells you to use them.) So I will be gaming with others using some primed but unpainted units [yuck] largely against opponents that have unprimed units (if current games are any indication). I have no intention of photographing my shame. I will post pictures of my painted troops from time-to-time, however.

    I thought about having the figures sent out for painting but Stormtroopers are black and white, for goodness sake, and my Rebels are Hoth-themed so they are black, white, tan, and gray. I cannot bring myself to pay someone to paint such simple schemes.

    Shawn and I keep talking about how we would like to sell all of our miniature collections and start over. One scale for mass battles and one scale for skirmish, maybe. Maybe not get into every period you can think of (except Pike and Shot; I have still resisted that!). Maybe spend more time on terrain.

    But, I can never bring myself to actually do it. So I duplicate periods in different scales.

    I am resolving to get rid of a lot of rules and game systems that I know I am not going to play again. I may do some serious digitizing of the rules and magazines. But there are so many game systems I have that I cannot bring myself to throw into a landfill and I don't want to pay to have to have it hauled off. For my old collectible card games, for example, I am probably just going to give it to a FLGS just to get rid of it. That alone should free up some space.

    If you have ever seen some of my cartoony wooden figures that I make, well, I will probably be doing a lot more of that. When I was about 13 I started making figures out of wooden beads. Knights mostly. Now that I am grown (HA! my wife would say) I still find I like the style. Also, I very much like painting freehand. It is much easier than painting modern commercial figures with an incredible amount of sharp detail cast into the figure. It may not sound like it, but trust me, it is. And "making" a figure these days is pretty much gluing one bead on top of another and adding a toothpick for a weapon. I am currently working on making vehicles using "granny grating". My first attempt is a pickup truck for my modern African army. (It will debut on the Wooden Warriors blog when I am done.)

    My temperament is such that I tend to rotate between activities and projects. For a long time that was computer gaming. Right now non-wargame computer games have diminished appeal. I need to paint and that can take a lot of time, but as my eyes fail I won't be devoting as much time to that. My solo gaming efforts are going strong, probably stronger than my non-solo gaming efforts. I am trying to change that, but I don't see myself ever moving away from solo gaming completely. So, hopefully, this year you will see more activity on this blog and my Solo Battles blog.

    Playing One-Hour Wargames Virtually

    $
    0
    0
    Shaun Travers has thrown the gauntlet in my face and challenged me to game of One-Hour Wargames (OHW). Alright! Thing is, Shaun is in Australia and I am in the U.S. ...

    I am not going to publish a battle report until the game is over (unless I lose, of course), but I thought it might be helpful to describe how we are conducting the game virtually.

    Choices


    I have played Tin Soldiers in Action (TSIA) virtually with both the author of the rules (who is in Germany) and with a gaming buddy in Texas and in all cases we used Skype and played real-time. Because TSIA is played on a square grid it was easy to describe what we were doing without having to constant move our web cameras to show our version of the battlefield. For example, to move you might say something like "I am moving my unit in square C4 to D4 then E4. Once there I am firing that unit at yours in square G4." Card draws were controlled by one player (as there is a common deck between the two players) who called out and displayed the card to the web camera. As I trusted my opponents I allowed them to make all die rolls and read me the results. (By that I mean that they told me the number of hits scored, etc. rather than reading me the number off each die.)

    As I said, Shaun is in Australia (apparently out of the fire zone, thank goodness) so Skyping is not a really good option given the significant time difference and international date line between us. (Shaun is in GMT+10, I believe, and I am in GMT-07.) So there was little overlap for us to game real-time.

    I play a bit of Heroes of Normandie (HoN) with gaming buddies in Ohio, and the computer version of that game can be played asynchronously as the game will send an email to you when your opponent has finished their move. You then start your game, watch the opponent's turn played, then play your turn. It works well even though HoN has a very interactive turn sequence. What I mean by that is it is not a traditional IGO-UGO turn sequence. Players alternate activating units, plus there is a discard phase, an orders phase and a supply phase, each of which are taken by players in turn. An 8 turn game might easily have 50+ changes of which player is acting. (Lots of emails pile up in your inbox!)

    OHW is much more conducive to playing asynchronously because it is much stricter as an IGO-UGO game; only one player acts when it is their turn and they act with all of their units. Even the more traditional games tend to have the inactive player (the player whose turn is it not) do something, whether it be to roll for hits in melee, save against hits, roll morale, or execute retreats. OHW has none of that. So in a 15 turn game there will be exactly 34 changes of which player is acting unless the game ends short. (Lest you think I am poor at math, the additional four changes are: Red and Blue roll for force composition and Red and Blue deploy their forces.)

    The only problem is: OHW does not have a computer version of the game.

    Computer-Aided Tabletop Gaming


    There are actually a number of computer programs that allow you to play tabletop games on a computer. Examples I am familiar with that you can search for are: Tabletop Simulator, Vassal, Roll20, Battle Chronicler and Universal Battle 2.

     Tabletop Simulator: There are a number of games played using TTS, including miniatures games. The most popular I know of are probably Warhammer 40K and Star Wars Legion. Unless you can leverage someone else's work, you need to create a lot of digital assets to represent your troops and terrain. One advantage, however, is that you can virtually flip the table, scattering the miniatures. Of course, I would not need that feature ...

    Vassal: As with TTS, and really with all of these choices, you will need to create digital assets for troops and terrain. Lots of other modules exist out there, so you could easier use one of those and raid their assets. The programming aspect of it is a bit tricky, but I have done it before. Vassal provides great logging features, allowing you to replay the game in its entirety, including the die rolls (proof that you were robbed by the dice). I have played a number of board game tournaments using Vassal, but most of the modules for miniatures games with free-form movement were rather clunky.

    Roll20: As it so happens, I started a Roll20 version of TSIA and it was not too bad of a development tool.


    Given that its root are to support playing role-playing games virtually, supporting things like unit having hit points (as OHW has) is rather natural. Roll20 can have quite a bit of complexity, such as using line of sight and having fog of war features, so if your game has those elements, Roll20 might be right up your alley.

    Battle Chronicler: I looked at this tool back in 2010 and used it for a DBA game and my notes say it had a sharp learning curve. At the time Steve-the-Wargamer was using it (not sure if you still are Steve), but Shaun Travers was not keen on it. So that is out, given that Shaun is my opponent for this game!

     Ironically, I mentioned Macromedia Fireworks in that post, and how handy I was with it. Unfortunately, that tool was sold to Adobe and it now out of my price range for what I used it for. I have yet to find a cheap or free tool that did as well what Fireworks did. [sigh] That said, I will tell you what I use.

    Universal Battle 2: This tool looks to be much easier when it comes to digital assets provided. But it also comes with a "Pro" subscription with a monthly fee. Its main user base appears to be players of Kings of War. If I played that online, I would probably use it. But I could not find a way to upload my own digital assets, nor any information on what formats it supports and so on. From a player perspective though, this looks good.

    As it stands though, all of them require up front work and I want to game now.

    Figuring out the Physical Game


    OHW provides the map for the scenario (we are playing Scenario 7: Flank Attack 2), but we still needed to figure out how we were going to play the game. Skype and other real-time tools were out. If we recorded our moves on a map, measurements would become interesting. Tools like those above all have a solution to this issue - they are designed to solve this problem after all - but if I waited until I had all of the graphics created we might never get this game off the ground.

    The first thing we decided to do ... (wait for it) ... was convert the game to a grid. That way we could use grid coordinates to describe our actions, just like I did with TSIA. What followed after that is an interesting discussion on what size grid square to use. A lot of it was a re-hash of my blog post in 2016 about converting games to a square grid, but interestingly we both came to agree on a solution other than the one indicated there and the one I initially recommended to Shaun. (This is why it is good to hash out these issues in email and get other people's perspectives.)

    But, to recap, using a square that was the size of the unit was out because the recommended unit size is 4" to 6" wide and a 6" distance between squares is not granular enough (some units have a 9" move and road adds +3" to your movement). This led to a square being one-half the width of the unit (2" to 3") so 3" squares did the trick ... except that OHW pivots on the center of the unit, which doesn't work.


    Moving the unit's center point to the vertices of the square (the dots) solved the pivoting issue, but introduced a new issue (which I honestly do not want to even go into).

    The solution turned out to make a square one-third of a unit's frontage. If we assumed that the unit frontage was 6" that meant each square was 2" of game scale, which again is a problem for measurements that are in 3" increments. However, as the range of the unit's frontage is 4" to 6", if we made each square 1 1/2" in game scale then 2 squares equaled 3" (what we needed for movement) and three squares would be 4 1/2", which was within our acceptable range of unit frontages.


    From there you could scale up or down as much as you wanted. A square represented 1 1/2" in game scale, but you could make the actual squares 15mm wide, thus three squares would be 45mm, allowing a 15mm DBA stand to fit nicely. Or, if you were playing with three DBA stands per unit, as I did with my last game, each square would be 40mm wide. Shaun and I would be able to play on different sized boards, both using our armies with DBA basing, but it could look vastly different, physically.

    Okay, so we have the game scale to board scale figured out. Now we needed to convert Neal's map to our game map with squares and grid coordinates.

    Computer Tools


    I used Microsoft Visio to make my initial maps, but I have since learned of an online drawing program called Vectr that seems promising. Here is the Scenario 7 map, converted to a square grid.


    As you can see, the map is 24 squares (36" at 1 1/2" per square in game scale) horizontally and vertically, and we have a grid coordinate system. The hills and woods are marked out, as are the blue and red deployment areas.

    As we progress through the game, I intend to create a new graphic for each player's turn, such as the example below. The color will indicate the unit's side, type, remaining hits, location, and facing.


    That way I can see a progression of the game, which is basically what I do when photographing each game.

    Die Rolls and Communication


    I wanted an online tool where our conversations about what happened each turn for each unit would be logged, but it could provide us with dice rolling tools where the rolls would also be logged and everyone could see them, even if you were not logged in at the time the die roll was made. A quick search showed that the online role-playing community has several options, but I settled on Rolz. It provides exactly what we need.


    Above is the start of our game. We rolled off to see who was Red and who was Blue. (I am Blue in this game.) We then proceeded to roll for our force composition. I have three Knights, one Levy, and two Men-at-Arms. Shaun has four Knights, one Archer, and 1 Levy. (I think I have the better force composition, but we will see. My Men-at-Arms will be fighting uphill against his Knights and Levy.)

    As you can see, I got excited to get going and already deployed my troops. That was more as an example to Shaun of how I was thinking of doing notation. So now, my map looks like this.


    Weigh in, if you like, on my setup. Granted, I should have waited for Red to deploy first, but I don't think it would change my disposition. We will see what Shaun comes up with though.

    The Goal


    Of course the primary goal is to have fun and game with new people and methods. But an additional goal is to create a Blue programmed opponent for this scenario, period, and rule combination for solo gaming. To see what I am referring to, read this blog post on my Solo Battles blog. I already have an example of a Red programmed opponent for scenario 8, Medieval and Dark Ages variants of OHW. (A different) Shawn played the Dark Ages variant, while I played against the Medieval variant.

    I have already developed the Blue program for this scenario, but I am leaving it open to modification until this game is complete. I reserve the right to modify it mid-game, should I find an situation I did not cover. That said, I fully intend to use the Blue program to play this game against Shaun. (The Australian one, not the American one.) Shaun said he was aiming to write a Red program for this scenario, so I have high hopes that this will be the first programmed opponent trading I will have accomplished since putting forth the idea. (No pressure, 'eh Shaun?)

    Stayed tuned for more information on this game as it progresses. I do not intend to do a blow-by-blow, but I may talk more about the mechanism he and I develop for this virtual gaming experience, and discuss any OHW hiccups we run across. Shaun may well have something on his blog also.

    One-Hour Wargames in the Age of Sail

    $
    0
    0

    Update


    Before I get into the subject in the title of the post, let me say that the virtual game of One-Hour Wargames (OHW) I have going with fello blogger Shaun Travers is still going, but coming to a close. We averaged about one player turn per day, although there were at least two days in which we each got a turn in on a single day. Shaun would generally make a move in his evening, which was about 2 AM my time. So, if I got up to go to the bathroom - and given that I am 58 now, need I say more? - I would see his move. I generally tried to hold off and wait to process the move first thing in the morning and there were a few nights that I did not wake up until the alarm went off.

    Initially I used Microsoft Visio to make the maps and show the moves, but I eventually moved to an online, web browser-based, free drawing program called Vectr. As tools go, it is pretty nice. As the 24x24 grid alone is over 500 objects, it handles it all pretty well. I would make a drawing of the end of each player's turn and denote now many hits remained on each unit. Here was our setup.


    You will have to wait until the battle report to hear how we came up with this grid solution. It is a long story.

    OHW in the Age of Sail


    Do you have any of those Pirates of the Carribean PocketModels from Wizards of the Coast? Well I do. A lot of them. (And I mean a lot.) The only problem with the game was, the rules are not my cup of tea. Not only was it a game of micro-measurements (meant to be played on a very small space), but because the models were small, lightweight, and plastic, if you breathed on them heavily they would go skidding across the table. Because being 'in' or 'out' of range could be a fraction of a very small measurement, table bumps could be strategic. (This is why I stopped playing Wings of War, Star Wars X-Wing, etc. because a slight mistake could send models skidding, which was akin to knocking a Chess board.)

    I have used the models, which are very nice if simple, for other games. The closest I came was a set of rules called It is Warm Work (IIWW), which I bought on Wargame Vault and actually played the one and only time I went to Cold Wars. Relatively simple rules with a couple of pages of ship data. Has the typical hit system where you check off boxes on a roster. The main difference is that the rules are not that crunchy, so you did not separate hits out between, say, rigging and hull. Much simpler than the old Avalon Hill game Wooden Ships and Iron Men.

    Given my virtual game - and the discussion we had on converting free-form movement to grids - something went off in my head and reminded me of the vast collection of plastic ships I have stored away in a shoe box. If you limit one ship to a grid (unless there is a ram or collision) then the IIWW concepts might work, only maybe simplifying it further down to the OHW level.

    First thing you need to do, however, is use a hex grid. Most sailing games do well with a hex as you can model a sail's reaction to the wind rather well. Wind coming straight on stops you ("in irons"), wind abeam (green) allows you to travel faster, and wind close quartered or aft (yellow) makes a little slower.


    So movement would have to change a bit from OHW.

    The core concept that you would keep, however, is that combat is simply reduced down to a single die roll. Whether you would roll a D6+2, D6, or D6-2 would come down to how many guns your ship has. Like OHW you would simply record total hits on the unit and once it reached a certain number the unit was removed from the board. (Whether that represented a ship running, striking its colors, or sinking was irrelevant from a battle viewpoint - you were out of the battle in all accounts - but might warrant figuring out if you were playing a campaign.)

    If you wanted to go through the complexity of it, you could assign a different number of hits to each ship type. I would not go nuts with it, but you would probably find that the ships with more guns also take more hits.

    Ranges, by the way, would be short. More like infantry arms than artillery, to account for the inaccuracy of firing  on an unstable firing platform.

    Another Neil Thomas concept is that you have to roll for force composition. That could also be done with this variant, substituting one unit type for an appropriate naval one. My guess is that you would want 3-4 ships with D6 and 15 hits, 0-2 ships with D6+2 and 17 hits, 0-2 ships with D6-2 and 13 hits, and 0-2 special ships. What those special ships would be would largely depend upon the scenario. They could be merchants to be guarded, a group of gunboats, an oared galley (Pirates of the Barbary Coast), or a sloop rigged fore-and-aft (as opposed to the standard square-rigged sails of the day).

    Just some thoughts to toss out. If I expand on it further, I will definitely write a post about it.

    Playing One-Hour Wargames Virtually - Part Two

    $
    0
    0
    As mentioned in a previous blog post, I have been playing a game of One-Hour Wargames (OHW) with fellow blogger Shaun Travers. For me, this game really accomplished two things: 1) it allowed me to game with Shaun, who is in Australia and so is someone I am unlikely to ever meet in person; and 2) I was able to dragoon him into writing a 'program' for the Red player in the medieval variant of OHW for scenario 7 (Flank Attack 2). It also gave me the incentive to write the Blue program for the same variant and scenario. Because we are in the process of playing the same scenario, only reversing the sides, it will also incentivize me to write a Red program of my own.

    The basic flow went like this:
    1. I drew the map out on a square grid (24 squares by 24 squares), indicating all of the grid coordinates, terrain, and deployment zones.
    2. As the Red player Shaun rolled in a private dice room on Rolz what his Red force composition was.
    3. I rolled for the Blue force composition in the same dice room. (This allowed us to both see each other's die rolls.)
    4. Shaun then deployed his forces and indicated their location and direction on the map.
    5. I deployed my forces on the map and published it.
    6. As Blue is the first player, I used the dice room's chat to indicate everything that was done. I would step through the phases and indicate which unit was moving, from where to where, and how they ended up facing. If a unit charged I would indicate 'charge to' instead of 'move to' so that it was clear that it would act in the Hand-to-Hand Phase also. As I never had any Archers, I never had any shooting. When it came to hand-to-hand combat I would indicate the unit by its location, state it was attacking, state the unit being attacked by its location, indicate the dice and modifiers, and virtually roll the dice. An example entry might be:
      1. Blue Knights in C7 attacks Red Knights in C6 inflicting [(D6+2)/2] hits.
    7. The formula in the '[ ]' told the dice room to roll the virtual dice and print the results.
    8. After I had done each attack in turn I would update the number of hits on each enemy unit on the map, end the turn, and then publish the map.
    9. I would then send an email to Shaun with a copy of the map so that he could verify the positions of the units and their hits matched the commentary and die rolls in the dice room.
    10. Shaun would then take his turn, repeating steps 6-9.
    11. Shaun and I would then repeat steps 6-10 for each of the 15 turns. (Well, given that we had Knights, it did not last that long.)
    As it turned out, neither of us actually set up a board and miniatures. We could have, of course, but all of the information was right there on the map. What unit, type, location, and remaining hits there were, it was all there.


    Note: this is the second game, in progress, which uses a 6 square by 6 square board. But you get the idea.

    Was the creation and updating of graphics tedious? Not at all (for me). I simply made a copy of the previous turn's map and then moved the pieces around. Vectr is a very easy program to use. Sure, I could have made it prettier by coloring the board a grass green and using contours for the hills, but initially the map was just supposed to be used as a visual check on our moves and not to be the whole game.

    If anything was a snag, it was the use of a grid where a unit straddles multiple squares. In the past I have always played OHW as "one square holds one unit and one unit resides in one square", so I was set mentally on how things worked. By changing the grid size it opened a lot of exceptions that complicated the mechanics. We have since switched to a 6" square grid for this game. The medieval variant has no units with 9" of movement and this scenario has no roads, so no +3" movement bonus occurs, so 6" measurement increments work fine. If I had to handle 3" increments, I would use a marker that grants an extra 6" square of movement the second time a unit gets 9" of movement (a carryover of sorts). Most units using road movement won't be moving on a road a second turn, so effectively you can ignore it. However, for periods that have units with 9" of movement, they will be able to get a burst of movement every other turn, as if they are alternately sprinting and resting.

    The Battle


    Before I start please note that both Shaun and I wrote 'programs' to control the behavior of our forces' units. So if they seem to have acted strangely at times, it is probably a rough spot that needed to be smoothed over. Also, we allowed ourselves to add to the program during play to cover situations that we had not accounted for – writing a programmed opponent is not trivial – but hopefully nothing changed drastically. I don't think Shaun took advantage of that rule, but I did as I struck upon a concept that I had been trying to mentally describe for a while now. So, I was happy with finding a breakthrough. I will be covering that in more depth on my Solo Battles blog.

    The Scenario


    The scenario we played was number 7, Flank Attack 2. In this scenario the attacker, Blue, has crept up on the flank of Red, presumably under the cover of a fog because they get close and get to attack first. Blue's forces are split, 2 units to the South on a small hill, and 4 units to the East. Red's forces are all on a large hill to the North. Blue must end turn 15 with no Red units on the large hill. Anything else results in a Red victory. Because Blue moves first and Red last, Blue must pretty much eliminate all 6 Red units in 15 turns.
    As indicated above, we are playing the medieval variant of OHW.


    As you can see in the image above, Red (Shaun) has four Knights, one Levy, and one Archers unit. I have three Knights, two Men-at-Arms, and one Levy unit. I feel like I drew the better lot as Men-at-Arms have more staying power (they take one-half casualties) and I think this game is going to be about grinding attrition.

    Because the Blue units are poised to the attack, they are going to start by inflicting double casualties on their charge. Fortunately, because they are on the hill they will only take one-half casualties. Still, this is what it looks like after the initial attack by Blue.


    The Red Knights at the North end of the hill took the brunt of damage, taking six hits.
    In hindsight I think I might have preferred having a Knights unit attacking, at the very least at the Red Levy, so they could gain the hill faster.
    One of the great things about playing other people outside of your normal gaming group (or people in general, if you play solo a lot) is that you can check your assumptions about your rules interpretations, especially with rules like OHW where Neil Thomas leaves a lot of details to the players to figure out based on their "normal" gaming conventions. If you read some of the comments to the posts about OHW you can see a lot of different ideas about how others handle things differently than I. For example, when Shaun attacked one of my units later in the game, he halved the casualties against me because my unit was on the hill (as was his). I had always read the rule as "uphill", i.e. the unit higher up the hill gets the defensive bonus, thus only one unit would get the bonus (or neither), but never both. Looking at the rules I found that it indeed did not specify that, but rather that if you were on the hill, you got a defensive bonus. (I know I got that "uphill" concept from DBA.) Always check your assumptions!

    Another issue that we had to work through is "turning to face" when attacked in the flank or rear. Shaun was used to an Ancients set of rules that allowed units to attack to flank (without penalty!) and because the language in OHW made turning to flank optional, there was a discussion of why a unit would turn. Note that it was a quirk of our using a grid that made this a point of discussion. Because the Knights on the North end of the hill were clipped in a strange way, when they turned to flank they would displace off of the hill. We sorted it out in a few emails and it gave us both reason to get rid of the 24 by 24 grid used in this game. (But that is a future post.)

    My program hit its first addition on the second Blue turn. Here is how the turn ended.


    My Blue Knights to the South were facing off against units on the hill, the Red Archers and the Red Knights. My program took into account when a unit was under fire by Archers and could not return fire, thus my Blue Knights to the West charged up the hill against the Archers. But, why did my Blue Knights to the South not charge his Red Knights on the South end of the hill?

    Looking at it logically, it was a losing battle. I would charge and score [(D6+2)/2) hits (halved because he was defending the hill, but his return attack was going to be [D6+2] hits. He was going to inflict twice as many hits as I could. The only way I could beat him was if he rolled a '1' (inflicting three hits) and I rolled a '5' or '6' each turn (inflicting four hits) each and every turn. I don't like those odds.

    So, I needed to articulate that sort of hopeless situation in a rule to allow a unit not to charge headlong into battle like some dumb A.I. Thus was born the concept of the Average Turns to Eliminate or ATE. If you have read John Acar's blog post on how he took Kaptain Kobold's TMP post on modifying OHW's combat system then you know about the math that John goes through. Basically it boils down to this: a unit hitting with D6-2 will, on average, take about 9 turns to eliminate a fresh enemy unit. Let's call that an ATE of 9. Using that logic, a unit hitting with D6 is an ATE of 5 and D6+2 comes out to an ATE of 3. When you add in other factors, like doubling for flank attacks or halving for terrain or armor, you get ATE values as indicated in the following table.

    Base DiceUnmodifiedDoubledHalvedQuartered
    D6-2951523
    D653812
    D6+23259

    Note that a unit's ATE can change based upon the target. Continuing on with my example above, my Blue Knights had an ATE 5 against the Red Knights on the hill, while it had an ATE of 3 in return. So now I could express the rule: if the attack would result in your unit having an equal or lower ATE that the target unit, you can charge it; otherwise find another target or stand your ground until the situation changes. The Blue Knights against the Red Archers, on the other hand, had an ATE 5 versus the Archers ATE of 9 (as Archers are D6+2 when shooting, but D6-2 when in hand-to-hand combat). As it stands, even when not writing a programmed opponent, this is a good way of looking at whether you should make an attack in OHW.

    The first unit to crack was the Red Knights unit displaced off of the hill.


    As you can see by the rest of my forces though, they are pretty bruised and beaten. (As this is at the end of a Blue turn, hit counters reflect one additional turn of attacks by Blue units.) The Blue Knights facing off against the Red Archers are looking particularly anemic. If the Red Archers roll a '1' or '2', they would score no hits. So far they have not rolled any, so they are due any time now...

    With my Blue Knights to the North free, I need to ensure that I do not block my Blue Levy from getting into the fight. Ideally, I would like to get my Blue Levy on the flank of the Red Levy and just start rolling up the defensive line from the flank.

    But, it was not to be. The Red Archers claim my weakened Blue Knights.


    I have to admit, I was perplexed. I had two Blue Knights units standing off against his two Red Knights units, both of which had better ATE scores than me. I had needed those Blue Knights to eliminate the Red Archers so it could charge the Red Knights to the North and break the stalemate. Now, my other Blue Knights to the South were going to get pin-cushioned by those Red Archers!

    It wasn't until Blue Turn 6 that we had another significant turn of events. Two Red units were eliminated in a single turn.


    My Blue Knights had moved to the West and charged the Red Archers, weathering their fire the whole way. The Red Levy had also held up a heroic defense, staving off a full turn of attacks by two Blue units (one in the flank) before succumbing. As you can see, my Blue Men-at-Arms unit to the South of the East end of the hill has one hit left, so it will be eliminated the next turn. My attempt at rolling up the flank did not succeed. Interestingly my Blue Knights that finished off the Red Archers are in a position to charge straight into the Red Knights to the North, depending upon what the Red Knights to the South do. Their program has them just sitting there, so far...

    The Red Knights, surrounded by Blue forces, circle the wagons to defend against the attacks coming from all directions now. The first of the Blue Men-at-Arms units fall.


    If you do a little counting of the hits you will notice that at the bottom of turn 6, both sides have 33 hits remaining. I have the advantage of four units to three, but he has the terrain advantage. As Shaun said in email "every turn I change between thinking I am going to win to thinking you are going to win". To me, that is the mark of a good scenario design.

    Without going through the blow-by-blow my Blue Men-at-Arms to the East eliminate the Red Knights on Blue Turn 8. This is followed by the Blue Knights and Blue Levy eliminating the Red Knights to the North on Blue Turn 9. Despite the equal number of hits back in Turn 7, the extra unit hitting on the flank – and my dice generally getting warmer while Shaun's get colder – is telling. On Blue Turn 10 – with only five turns remaining – the last Red unit falls.


    Blue has four units and 17 hits remaining.

    Summary


    This seems like a really hard game for Red to win. Hit on the flank in turn one with units eventually coming in from every direction. The only problem Blue has is the initial issue of the majority of his units having to break out from a small area. They need to bring their units to bear on a relatively static defense.

    Rather than us just leaving it there, Shaun and I are switching sides and replaying the scenario. I have played several of these 'King of the Hill' scenarios and it is time to try something new...

    Playing Virtually


    Undoubtedly playing virtually does not have the spectacle of a miniatures wargame. There is nothing to say that I could not have set up the board and miniatures. Given our second game is going slower than the first, I may just do that. As shown in the first picture in this post, we are switching to a 6 by 6 board, so it should play smoother. Shaun did not want to deal with units facing diagonally in the square and I did not object. I think it is always good to try a new approach. You never know what will and what won't work until you try it. And playing virtually with people you have never played is a great way of breaking out of your solo or limited gaming group mindset. Give it a try and let me know how it works.

    Programmed Opponents


    Want to try my Red programmed opponent for Scenario 8, Medieval variant of OHW? Here it is. Note that this is an older program, and although it needs to be updated, it is still functional.

    Want to try my Red programmed opponent for Scenario 8, Dark Ages variant of OHW? Here it is. Note that this is an older program, and although it needs to be updated, it is still functional.

    Want to try my Red or Blue programmed opponent for Scenario 7, Medieval variant of OHW? Here it is.

    Want to try Shaun's Red or Blue programmed opponent for Scenario 7, Medieval variant of OHW? We are still working on refining and publishing them.

    If you want to send me a programmed opponent for OHW, drop me an email (it is in my Blogger profile). I would love to fight against it.

    I would love to write a book listing all of the programmed opponents for all of the variants of OHW for all of the scenarios but I think it would take a really long time to play all those games, and the publishers would probably have a fit. But that doesn't mean I can't keep making them and publishing them as blog posts. One of these days I may put out a couple of PDFs and put them on Google Drive, but for now, look for them on my Solo Battles blog.

    A First Look at Undaunted Normandy

    $
    0
    0
    Undaunted: Normandy (UN) is a card, tile, and counter game of small-unit infantry combat in Normandy 1944. It is called a "deck building game" by the publisher Osprey Games. When most people hear that term they think of something different than what it really is. You do not pick and choose your cards from a large pool of options. Rather, the scenario defines what cards are available because the cards are the soldiers in the fight. If you have ten "Rifleman" cards you have ten soldiers with rifleman qualities.


    The box contains all that you need for a game. It is smaller than a standard Letter size page and about 3-4" thick, so the game is very compact. Inside is a nice plastic tray to hold the game tiles, four 10-sided dice, and the two decks of cards (German and U.S.).


    Underneath the plastic tray there is more than enough room to hold all of the counters in the game.


    The game includes a rule book, which contain more than enough examples of play, and the scenario book. The rule book is very thin as this is really a fairly simple game. Don't let that fool you, however. The gameplay is very thought-provoking.


    This is what the first scenario setup looks like. Each tile has a number and a side A and B. The map shows you which tiles to use, how to place them, what units are in play, and what additional markers to use (such as objectives, control, scouted, and spawn markers).


    This is why I say it is not really a deck building game. Half of the fun of the game is building a deck and tuning it over time. In UN the scenario specifies which cards are in your starting deck (black circle with white D), which cards are in your reserves (white circle with black S), and which are not in play at all.


    In the beginning scenario both sides start with two squads of five riflemen and two teams of three scouts – represented by four unit counters on the board – one platoon sergeant, and two squad leaders – represented only by cards.

    Here is the board, set up and ready to go.


    First thing to notice is that each area of the map is a square tile. Note that the squares are offset so each square is surrounded by six adjacent squares, much as a hex grid would be, rather than four adjacent orthogonally and four adjacent diagonally as in a square grid.

    Each square has a white number inside a black shield at the bottom center. This represents a defense value given to any unit in the square being shot at. Values in this set of tiles range from 0 to 3.

    In the upper-right I have placed the light brown objective markers, which look like guidons. Each has a value from 1 to 3, indicting the number of objective points allotted to the player that controls the square. In this scenario the German player starts with control of 3 objective points (last column, middle row square). In this scenario, the first player to reach 5 objective points immediately wins the game.

    In the upper-left corner of the square I place the control markers. A control marker for your side can either show binoculars, indicating you have scouted the area, or an insignia, indicating you control the area. If you control the area then you claim the objective points in the square. A square can have scouted control markers from both sides, but only one side can claim control of the square (have the insignia side up).

    In the early scenarios there are two basic unit types: riflemen and scouts. Scout units move through areas, placing scouted control markers in each square they pass through. Riflemen units can only move into areas that have scouted markers for your side. Once in a square they can attempt to control it, earning the objective points if successful.

    That is pretty much the game. Use scouts to scout out areas then move riflemen in to control them and score objective points. Whichever side scores enough objective points first wins.

    Turn Sequence

    Your cards exist in one of six places: the deck; supply area; your hand; the play area; the discard pile; and the dead pile. Here are what the cards look like.
    The number is the upper-left corner represents an initiative value. Each turn both players draw four cards from the deck to the hand. They will pick one of those cards in the hand to use to bid for initiative. The card with the higher value wins the bid, gaining initiative. (In the case of a tie, the player with initiative retains it.) That bidding card is then placed into the discard pile.

    The player with the initiative plays one card from the hand at a time into the play area, taking one of the actions indicated on the card. For example, looking at the card for the Rifleman in Squad A (second row, middle column), you can see the actions below the green stripe: Move 1; Attack 1; and Control. This allows the unit to move one square, attack once, or control the current square.

    The player plays all of the cards in their hand, one at a time, until all of the cards are played and none remain in the hand. All of the cards in the play area are placed in the discard pile. The player that lost initiative now does the same, playing each of the cards from their hand one at a time until done, then moving the cards in the play area to the discard pile. The turn is now done and a new turn is started.

    • Draw Cards
    • Bid for Initiative
    • Initiative Winner Plays Cards
    • Initiative Winner Discards Played Cards
    • Initiative Loser Plays Cards
    • Initiative Loser Discards Played Cards

    Note that there is no "check for victory" phase. As soon as one player fulfills the victory conditions, play immediately stops; it does not continue until the end of the turn. Thus holding initiative has an inherent value.

    Once a player's deck is exhausted, their discard pile is shuffled and then becomes their new deck.

    Command and Control

    The cards represent your command and control ability. You can only act with the units that were drawn into your hand that turn. Because you only have three cards to play, your ability to act more than once with a unit relies on the luck of the draw. But, there is a way to change the odds.

    You have several cards which represents soldiers on the battlefield, but not on the board as a separate unit: the Platoon command staff (Platoon Sergeant and Platoon Guide) and the Squad command (Squad Leader). These cards have special abilities like Bolster, Command, and Inspire.

    Bolster

    The Bolster action, available to the Platoon and Squad commands, allows the player to move cards from the supply area (think of them as reinforcements) to the discard pile. This is how you increase the number of cards in your deck of a certain type, increasing the odds of drawing that card and of drawing more than one of that card.

    Command

    The Command action allows the player to draw additional cards from the deck to the hand, thus changing the number of possible actions a player can play in one turn.

    Inspire

    The Inspire action allows the player to take a card from the play area, i.e. a card already played this turn, and place it back into the hand, effectively allowing a player to play a card more than once a turn.

    Hunker Down

    One final action a player can take – although it is not listed on any card – that impacts your card composition is Hunker Down, which is done with a unit card. This means that the card is played from the hand back to the supply area.

    The Fog of War

    There are a specific number of Fog of War cards that are placed in your deck and supply, dictated by the scenario, that represent the loss of command and control. These cards effectively clog your hand, allowing you to take no action. Scouting an area will transfer a Fog of War card from your supply to your discard pile, a Conceal action will transfer a Fog of War card from your enemy's supply to their discard pile, and a Recon action will transfer a Fog of War card from your hand to the dead pile. Note that all of these actions are only available to Scout units. Also note that you cannot Hunker Down with a Fog of War card as it is not a unit card.

    Combat

    As discussed previously, the square tile that a unit is in indicates it defense value. Each unit also has a defense value, indicated on the unit counter in the lower-left corner inside the shield. Finally, the farther a unit is from the target it is shooting at increases the total defense value.


    To resolve combat, a unit takes an Attack action and adds the square's and unit's defense value to the number of squares from the firing square to the target square. In the example figure above, the German Rifleman Squad A fires one square at the U.S. Scouts Team B. The range is 1 + 5 defense value for the unit and 0 for the square's defense value for a total of 6. The attacker then must roll a '6' or higher on a D10 to score a hit.

    If a hit is scored one card of the type in the squad indicated by the unit counter must be removed. The card is removed from the hand, discard pile, or deck (in that order) to the dead pile, and if no card is found, the unit counter itself is removed (even if there are still cards of that type in that squad remain in the supply area). Continuing with the example above, if the German scores a hit, a Scouts Squad B card must be removed as indicated above, otherwise the unit counter will be removed.

    Each scenario indicates a spawn point for each side. A unit counter can be returned to the board at the spawn point if a card for that unit type and squad is brought into play, such as with a Bolster command.

    Note that there are other types of combat such as suppression (requires discarding a card in lieu of taking an action) and HE attacks (called blast attacks). This covers the attacks by two other types of units not represented in the first scenario, machine guns and mortars. The final unit type is the sniper.

    Final Note

    There is no variance between the cards of a single unit type, other than the name of the person and a squad designation. So one Rifleman card always has the same initiative value and actions available as every other Rifleman card in the game. The variance is between the card types, i.e. Rifleman cards are different from Scout cards which are different from Mortar cards, and so on.

    Sample Game

    Here is the first scenario at the start. The Germans start with 3 objective points under their control, but only one objective point between the German and U.S. starting positions. In order for the Germans to win they must either take the objective in front of the U.S. starting position or one beyond the U.S. starting position.


    By turn 2 the U.S. forces were able to push their rifle squads into the farm, capturing the first objective (worth two points), making the score 3-2 Germans. The U.S. Scouts are contesting the objective to the north. Given that the defense value of that square is 2, it will be hard for each side to dig the other side's Scouts out.


    By turn 5 the U.S. have controlled another square, making the objective point score 3-3. In the upper-left corner you can see the face down U.S. cards. That represents the dead pile, meaning that the Germans have been scoring casualties while the U.S. have been scoring objectives.

    In the north the Germans have doubled up to try and dig out the U.S. Scouts, which is largely where those casualties came from.


    By turn 7 the Germans have eliminated four U.S. cards and removed the U.S. Scouts Team A unit counter (which spawned back on the board by the end of the turn). This allowed the Germans to take back the lead in objective points, 4-3.

    Meanwhile the U.S. has been causing German casualties of its own (two) while U.S. Riflemen Squad A is poised to control the final objective for the win. Despite the Germans blazing away at the unit, it has not been able to take it down. As you can see on the left side of the image, all of the supply cards for units have been added to the U.S. deck, save for a few Fog of War cards.


    By turn 8 – despite not having the initiative – the U.S. secured the last objective, putting them at 5-4 for the win. Overall the U.S. lost five men to the German two, but the U.S. kept their eye on the objective and prevailed.


    This was an interesting scenario to start with as the Germans have to either attack close to the U.S. reinforcement (spawn) point or attack across an open field (square 3B in the second column, bottom row) to control the farthest objective (square 6A, first column, bottom row). The objective to the north (square 7A) is a distraction to the Germans, and should the U.S. challenge it, it will be slow for the Germans to control it due to the good defense value of the square.

    Overall Impressions

    One of the hardest decisions to make when gaming solo and using rules where you do not have full control, i.e. not every unit can act in a single turn, is decided which unit should act. UN solves that problem for a solo gamer as this decision is taken away as a core mechanic.

    That said, having hidden information in a game is generally the bane of the solo game and it has two: card hand management and hidden bidding. I talk about how to deal with that in a post over on my Solo Battles blog. Some say that any randomization of the bidding is detrimental to the game as initiative is core to the game, but I did not find it so. There were turns in which I intentionally gave up the initiative in order to get rid of a dead card in the U.S. hand. But then again, I need to play it a lot more to really get a feel for the true importance of initiative.

    The rules are very simple and there was nothing I had a question on. I can see that might be a problem with a future scenario in that there are no explicit canal rules that I can find.

    The concept of dividing cards into a deck, representing forces actively engaged, and a supply, representing temporarily ineffective members of a squad, or even off-board reinforcements that enter at the reinforcement (spawn) point, is a really slick concept. If playing a campaign game, say with something like Platoon Forward, you can easily assume cards in the dead pile as simply rendered ineffective for the remainder of the battle. After the battle is over you can roll to see if you find them cowering in the rear, at the first aid station, wounded and out of action for awhile, recipient of a million-dollar wound, or in fact dead.

    I can easily see myself playing Undaunted: Normandy again, and I have already pre-ordered Undaunted: North Africa, which is the sequel pitting Britain's raiders from the Long Range Desert Group against the Italians in North Africa. (I can foresee playing the Italians as the non-player side.) My hope is that this game will introduce light vehicles.

    Recommended.

    Miniatures

    I can easily see using 15mm miniatures with, say, 6" square tiles. For each unit card in the deck initially you would have a miniature by the corresponding unit counter. As more cards are added through the Bolster command, you would add more miniatures to the units. As cards are sent to the dead pile, so would the corresponding miniature.

    Would this be necessary? Of course not. But nor are miniatures necessary for practically any miniatures rules out there. (Well, maybe the skirmish ones that take true line-of-sight and figure silhouettes into account. But you know what I mean.) I could see using this sort of ruleset to play out miniatures games the same way people use Command and Colors (Ancients or Napoleonics) for the rules, but use miniatures instead of blocks for the units. It looks much more glorious, but plays with the rock-solid rules that board games tend to have.

    One-Hour Wargames – Scenario 10 – Late Arrivals

    $
    0
    0
    If you were wondering why Shaun Travers (of Shaun's Wargaming with Miniatures blog) hasn't been blogging much lately it is probably because I have been taking up all his time with One-Hour Wargames (OHW) scenarios. We played Flank Attack 2 (Scenario 7) using Medievals and we just finished the first of two games of Late Arrivals (Scenario 10) using Ancients. A much different feel to the game with Ancients – Infantry hits with D6+2 but only take 1/2 hits due to armor – than with Medievals, Dark Ages, or Rifle and Saber.

    More importantly, the scenario is really interesting because Blue is the defender and they have some hard choices to make.


    Shaun and I again used a 6x6 square grid for the game – essential for virtual gaming if you are not using a computer program to indicate your precise position and make accurate measurements – shown in the image above.

    Blue is defending the town (F6) and Red only has to occupy it at the end of turn 15 to win. Blue gets two units at the start and can setup in rows 3, 4, 5, or 6, or in the woods (E-F/1-2). Note that the mountain (A-B/3-4) is impassable.

    This means that a core Blue strategy is to defend in squares C3 and C4 with Infantry and hold the enemy off. However, Blue only gets two more units on turn 5, and the final two units on turn 10. Ancient Infantry, being D6+2, has an Average Turns to Eliminate (ATE) of 3, meaning that it can eliminate an enemy unit on average in three turns. However, if the enemy unit is also Infantry, because it has has armor (1/2 hits) the ATE is 5 turns. So, this really turns into a race because it takes two turns to move the infantry to row 2, then turns 3 through 7 will be spent chewing through that front line of enemy infantry. With Blue having 3-4 infantry in their force they could easily have the second wave up to the battle line by turn 8, which would cause another 5 turns of combat, at least, to chew through that line. So simply pushing the infantry forward will not win the objective.
    Please note that I have the advantage of hindsight and playing once as Blue to give this analysis. My first attempt looked something like the image below.


    Trust me, the "Skirmishers in the Woods Gambit" is not a winning strategy. At D6-2 my Skirmishers were still cooking their breakfast in the woods when the Red Cavalry flew by, unscathed.

    In my opinion, if Red does not have Skirmishers or does not have two Archers, I am not sure Red can win in the Ancients period unless Blue makes a mistake. If Red and Blue have Skirmishers, Blue might have to commit it to the fight at the start if the game, which would make for an interesting fight. As I said this is an interesting scenario, but there are some matchups that seem like they would always result in a Blue win because the clock runs out.

    The Real Game 1


    As you can see above, my first game 1 was a disaster. I did think about potentially pushing forward with the Blue Skirmishers to block enemy units from coming on at C1, but it seemed like such a low probability of success that we bagged the game early on. I threatened to play that setup solo, but have yet to.

    I rolled and received three Infantry (of course!), one Archer, and two Skirmishers. To me, this was probably the worst combination I could think of. Two extremely brittle units and I would not have two full waves of dead hard Infantry.

    Shaun rolled and received three Infantry, two Cavalry, and one Skirmishers. All I knew was that having Cavalry might allow him to make a breakthrough to get to the town and having a Skirmisher meant the woods were not impassable too. So my first decision was whether to use a solid line of Infantry and risk him flanking me with Skirmishers to break through faster or using one Infantry and one Skirmisher and seeing how I could contain him. I chose the former.


    One of the other issues with this scenario is that Red enters from the northern road not the northern edge. This makes maneuvering out extremely hard and the introduction of the square grid does cause an issue with that, at least the way we play it.

    I imagined the units stacked up in "C0", off the board. I felt like from there they should be able to move one square on, so B1, C1, and D1 would be eligible squares. But Shaun pointed out that the scenario says "via the road on the northern edge", so given that we play "in the square" the first movement point is in square C1. This caused a jam up of Red units, as you will see.

    By the end of turn 2 you can see that the Blue Infantry have beaten up the leading Red Cavalry while doing almost no damage. However, I have this nasty habit of hitting units hard early on, then running out of steam while trying to finish them off. The main thing to notice as that only four of the six Red units have made it onto the board, with one Infantry and one Skirmisher still being off of the board.


    By the end of turn 5 one of the Red Cavalry units had been eliminated and a Red Infantry unit was getting dangerously weakened.  The last Red Infantry unit was on the board, but the Red Skirmisher was still off! The second wave of Blue troops were on the march.


    Turn 7 saw the elimination of the weakened Red Infantry in C2, but turn 8 saw the both units in the Blue front line eliminated. By then, however, the second Blue line was already in position. (Shaun forgot to bring on his Skirmishers, not that they could have gone anywhere.)


    Turn 9 and 10 saw Red unable to break through the second Blue line, so with the final Blue reinforcements entering the board, Red quietly withdrew their forces.


    Battle Summary


    There are so many interesting combinations to think about here and how it would play out in different periods.

    Medievals have mainly fast-moving Knights (D6+2, 12" movement), so unless Blue draws a force of two Men-at-Arms units (armored, thus take 1/2 hits like Ancient Infantry) the battle is not going to take place in rows 2 and 3, but rows 5 and 6.

    Dark Ages have mainly Shieldwall Infantry, which take half hits like Ancient Infantry, but only hit with a D6, so it is an even slower slog through rows 2 and 3. I think it would be even harder to win as Red in this scenario during the Dark Ages.

    Horse and Musket really changes things as Infantry now fire 12" with D6, so the name of the game is for Red to bring his superior numbers to bear, which is interesting given the confined space which they have to deploy to.

    How do you think your favorite period (using the standard rules) would play?

    What Else Have I Been Up To?


    As it so happens, the writer of the blog Red Player One lives in the same area as me. He and I played a game of Starport Scum by Nordic Weasel Games and it was really fun. It has been a long time since I played a narrative (RPG-lite) scenario. The rules are very simple, but effective. My hero, Flavio, cut the anti-hero Ahnuld in half with a single stroke of his monofilament blade. That gruesome kill caused the rest of the security guards at the compound where my brother Squigi was being held. (Yes, the Flavio Brothers – Flavio and Squigi – were reunited so they could continue their criminal "plumbing" careers together.)

    You can see some of Jason's cool terrain and figures over on his blog. The vidscreen of a pixelated geisha-like figure is hand-painted. Very cool.

    Jason is a dangerous guy to hang around though as he is a rules junkie like me. I ended up getting copies of Starport Scum and 5 Parsecs after reading his blog. Then again, he ended up getting Battlesworn. (We were going to play that this weekend, but we ended up having to cancel.)

    Although I did not give it a very strong try, I did try Star Wars: Legion and I just could not get into it. It has too many elements that I am not fond of. It is a very competitive 1v1 game where – unless you have basically bought one of everything or scoured the internet thoroughly – someone will eventually pull out something you have not seen and play gotcha! with a new special rule. Been there, done that with Warhammer 40,000, Warmachine, and Flames of War (multiple editions for each).

    I finally broke down and purchased the next version of Warhammer Underworlds, Beastgrave. I continue to like that game despite not being able to get that many games in and it being hard to play solo given the amount of hidden information. But I am working on that. More later on the Solo Battles blog.

    I have been doing some more painting. I am trying "comic style" which is a couple of steps beyond what I used to do as a kid, which is a heavy blacklining style.

    Finally, about a third of my team at work were let go. Our company decided that they did not want to keep them and decided to let the remainder – largely a bunch of techno-geeks – take over their duties, which was managing accounts, in addition to our normal duties. I am not going to say much more than that other than to say that my blood pressure spiked, badly, and I needed to find another job because that was not what I signed up for. So I did. Rather than working for the company that makes software for the US home mortgage market, I will soon be working for a company that uses that same software, i.e. I will be a customer. My work with the product and insight into how it works under the covers really helped me leverage a new opportunity. So let's hope the grass really is greener on the other side...

    One-Hour Wargames Scenarios – Filling in the Blanks

    $
    0
    0
    In the last blog postShaun Travers and I played scenario 10 in One-Hour Wargames and it turned out pretty disastrous for the attacker (Red). Although I like to flip the scenario and play it the same way, the way we played it just felt wrong. I do believe that some of the scenarios don't "work" with all periods, but in this case the math just makes it so hard to get the Red Infantry engaged against the defenders who will inevitably will Blue Infantry units. (There is a risky gambit involving defending initially with one Infantry and one Skirmisher, but that is beyond the scope of this discussion.) Basically, it takes turn three to four before Red can engage the Blue defenders. A big problem is that entry via the road is a huge bottleneck. How much of a bottleneck did Neil Thomas really intend this to be?

    When Shaun and I played the first time we assumed that "entry via the north road" meant that the first square the unit had to move through was C1. This meant that, at best, you were going to occupy four squares on turn 1. (B2 and D2, only if you had Cavalry; C2 if you had Cavalry or Skirmishers; and C1. Basically all of the squares indicated by Red arrows in the image below.) Note that it means that by the end of turn 1, Red would only have one Infantry unit on board, two by the end of Turn 2, etc. Given that the Blue defenders could start in C3 and D4, and could theoretically push into C2 and D2 on their turn (although would be unlikely to do so), they could really jam up Red forces until this first line of defenders was eliminated. As was shown in the last blog post, if they do not accomplish that quickly enough, Blue can reinforce the line such that Red will never reach the town, having to break through two lines of defenders.


    So, what's the alternative? Shaun and I talked about the concept of using an off-board square, in this case square C0. The idea is that all of the Red units start in the square north of the northernmost road square, just off board, i.e. square C0. If you did that, the number of squares that you could move to on the first turn are not only the ones with red arrows, but the blue ones too. More importantly, units with a 6" movement can move on and occupy squares B1, C1, and D1. This is three times the number than if you consider square C1 is the first square of movement (red arrows only).

    How will this affect the game? Quite a bit.

    The Game


    Red's first turn looks a lot better than the last game. There are four units on rather than three, two of those being Infantry. (If I had rolled two Cavalry, I would have had another unit on the board too.)


    My basic plan is to use the Skirmisher unit to flank Blue defensive line and break it faster. (Interestingly, Ross MacFarlane played the same scenario and had the same force that Shaun had when playing Red, used his Skirmisher to also make a flank run, but to secure the town instead.)

    By turn 3 everything was engaged.


    By turn 5, Red breaks through the portion of the line closest to the town.


    Just in time for Blue to bring on their first reinforcements. Mind you, by this time in the first game it was obvious that these reinforcements could make it close to the original battle line, but Shaun, seeing that I had already broken through, decided not to advance but rather to occupy the town.

    Infantry in the Ancient period take 1/2 hits as it is, with defending a town yielding another 1/2 hits. It is going to take some time digging them out. In fact, the only way to win is probably by attacking it from two directions.
    As a side note, in square grid combat you have to attack from F5 and E6. If the attack comes from E5 (which is legal) it essentially makes an implied pivot that 'hides' its left and right flanks (squares E7 and G5).
    Turn 8 saw the Blue Cavalry charge out and attack the Red Infantry that was attempting to move on its flank. This was a strong move by Shaun because with the Cavalry in E6 and its front facing D5, that puts its right flank in square F5.
    Again, that is a quirk of the square grid rules we use, but the best way to look at it is that OHW only allows one unit to attack per face and to get on the flank each unit must have a square in between each attacker. So a unit could be in square E5, but it would not be able to attack the Blue Cavalry.


    By Red turn 10, Red had the attack on the town secured. (I am not sure why Red Infantry in C5 is facing South and not West.) The Blue forces coming on can only enter from A6 or B6 and with the hill impassable, they have to go through me to disrupt the attack on the town.


    By the end of Red turn 13, the town was secured.


    This was a far-cry from the result in the first game (turn 10).


    Summary


    To me this was a huge difference in the result. The pendulum swung dramatically from "no way for the attacker to take the town" to "no way for the defender to retake the town". All because of the change of a single rule. (Shaun may disagree, but I remember that neither side had better rolls in either game, but this second game did result in both sides having bloodier results.)

    I am curious. How do you interpret the rule that "all Red units must enter the board via the road"? When playing the scenario without a grid, you probably use the same method as we used here, which is that all Red units are artificially stacked up on the point where the road intersects the board edge. This is equivalent to the "square C0" concept Shaun and I used.

    More importantly, does anyone map out the road march order and penalize the rearward units movement based on how far back in the march order they are?

    Comic Style Painting and Contrast Paints

    $
    0
    0
    This post will be a departure from my norm as I rarely talk about painting, although sometimes I show painted figures.

    More than 30 years ago I discovered waterproof inks and how they could be used in miniatures painting. Largely I confined myself to using them for painting horses, but on occasion I used them to paint cloth and leathers. I was also very much into blacklining when painting Napoleonic Austrians, which are practically all white.

    As time wore on and the inks dried, I switched back to painting block style with washes to increase contrast by enhancing the colors in the folds, but I was never too keen on it. I felt too many washes tinted the main color too much despite generally giving good results for the folds.

    Contrast Paints

    Then came contrast paints. Initial results that I had seen from YouTubers were ... ugly, to say the least. Painters I watch (or now watch) slowly started experimenting with the paints and the results started getting better. One good (but very long) video is Vince Venturella's "Ultimate Guide to Contrast Paints". He explores just about every way you can use Contrast Paints. If you only want to get an idea of some really cool effects, watch the beginning of  Juan Hildago's "'Eavy Contrast Marine - Death Guard" where he lays down the base color of the armor, then uses two other Contrast Paints as glazes to achieve the really stunning effect of Nurgle plague-affected armor. Long tory short, real artists started understanding that Citadel's initial instructions of "one thick coat" was a bad idea and that the qualities of the formula could be used for same really good paint jobs.

    I tried them and almost immediately did not like them. I could not seem to come even close to replicating the success of these guys, largely not getting the smooth colors without massive pooling, coffee staining, tide marks, and too heavy of a contrast. But, just like with painting, you have to keep practicing. So I would dunk my figures in Simple Green, take a soft bristle toothbrush to them, pull out the airbrush[1] to prime them, and start all over again.

    I haven't given up completely on Contrast Paints though. Here is my latest effort, Rippa's Snarlfangs warband for Warhammer Underworlds. This is what Games Workshop would call "battle ready", meaning I have used Contrast Paints to paint the miniature, but not used normal acrylic paints to come back and provide highlights.

    The Leader
    The Lancer
    The Bowman
    The wolves are actually painted with a homemade wash with ink to boost the contrast and drybrushing to accentuate the hairs with another color. That and there red eyes was the only instances where I did not simply use Contrast Paints; everything else is pure Contrast Paint. Mind you there is quite a bit of use of primer (black, grey, bone, and white) to provide additional contrast and an undertone, but basically the colors on the goblins and their equipment are Contrast Paints.

    Comic Style Painting

    Someone posted a picture of a gundam painted "comic book style" in a local gaming Facebook group and I really liked it. So I started looking up "comic style painting" on YouTube and FaceBook and came across Mike Cousins of Epic Duck Studios (FaceBook, YouTube, and Instagram) and the Comic Style Mini Painters FaceBook group (FaceBook).

    Mike Cousins is the one to inspire me to try comic style painting. If you are still wondering what comic style is, here is one of Mike's earlier models.

    Imperial Fists Space Marines
    As you can see, it uses solid black as shading, especially in areas not generally visible, uses blacklining to separate details and uses small "scratches" here and there to add interest and break up large areas of a single color.

    I have to say, I have not been successful at it quite yet. What I found hard is painting contrasts and then blacklining after the fact. Here is a better picture of some of Mike's work with his more common comic style (he has two).


    Here you can see that the colors, say the green in the tunic and the red in the hair, are not single shades, but generally three different shades, dark, medium, and light. These shades are not blended, but painted solidly, in order to intentionally increase the contrast. After that, he adds significant detail with black ink, giving it that comic style look. (Interestingly, this three shade style of painting, sans blacklining, is very much the style Matt uses on the Wooden Warriors blog that I co-author with him.)


    That said, Mike recently showed his second method of comic book style, which is to paint the figure white, add the black ink shading and lining, then color the figure, in this case with Contrast Paints. Here was his result.


    That is all Contrast Paint with no highlighting. As you look at the red you can see it is a bit blotchy, but for the most part it works really well. As I have that same figure (the whole warband, in fact), I decided I was going to try my hand at painting in this style, but use a different armor color. I like how the Ork flesh turned out, but I am hoping to get a smoother color on the armor. I am pondering, but not quite sure if I want to attempt, the Death Guard armor color scheme that Juan Hildago showed.

    Death Guard Space Marine in Contrast Paint
    That is all Contrast Paint. (He made it look so easy.)

    Step 1 – Black Shading and Lining

    After priming white I took out a Faber Castell XS black waterproof ink pen, which is a 1.5mm nib. I also have some 005 pens, which are 0.2mm. You can do much finer detail with the latter, but the problem is that the nibs are extremely short, and thus it is hard to get into some little crevices.


    As I get used to doing this more – it is slow, painstaking work – I have made some improvements. So it is a process of do a little with the larger pen, then with the smaller. Also, I find it easier to start with the brush in order to shade large areas first. This is what I like about this style; it forces you to focus on the areas people can see, and paint the rest black. Here are shots of the underside, with the black shading.


    Notice that under the chin, belly, legs, and arms it is solid black. Same with the bottom side of the weapon. Looking dead on from the front, back, or side you can barely see these black areas; you definitely cannot when the figure is on the table and viewed from above.

    This shading effect makes sure that you do not do something stupid like make sure you detail the bottom of the shoe or make sure that the underside of the weapon shaft is appropriately shaded and colored compared to the rest of the shaft. You immediately black it out and never have to worry about it again.

    Note that I did not ink the chainmail or fur pieces. These recesses will be handled by Contrast Paints. Same with the details of the face. As you can see with the Goblins at the beginning of this post, Contrast Paints work very well on their own when a figure has a lot of detail. Right now the faces look stark white, but they will come out with appropriate shades once it is all done.

    If the Goblins taught me anything it is that you cannot judge Contrast Paints by how they look initially. You really have to wait until it is all done and judge the effect.

    Well, I know I won't have the four Orks done any time soon. Although Contrast Paints can be a time-saving method of painting, the way I do it is not. I am too finicky a painter to let paints slop over the lines and two colors mix at the edges. (Painting in one color and then a second darker Contrast Paint color is however a legitimate technique.)

    But so far Contrast Paints produce the best results that my old eyes can handle. I either need to stop buying miniatures (selling a lot of my lead pile that I have accumulated), accept the battle ready style in order to get more troops on the table, or pay more people to paint my troops.

    Footnotes

    [1] Yes, I bought an airbrush, a Iwata Neo Air, which is their cheaper "starter" airbrush. Using it produces very nice, smooth coverage for primer. I have also used it for varnishing, but not much more than that. I think it is almost a must for painting with Contrast Paints, inks, or glazes because the paint is so delicate that brushing on varnish can sometimes chip the paint below.

    Contrast Paints for Painting Ork Skin

    $
    0
    0
    As I am painting a warband of Orks (or I guess they are now called Orruks) for Warhammer Underworlds the first area to address is their skin color. Citadel has a number of greens in their Contrast Paint line and, interestingly, it has changed shade from the "old days" when I painted Orks, i.e. Warhammer 40,000 Second Edition.

    The basic way that contrast paint works is that the medium tints all of the figure but is a much darker shade where it pools. As it pools in the cracks and crevices to a greater degree than it does on flat surfaces, it naturally shades the model, much as their earlier washes were designed to do.

    So what is the difference between a wash/shade and a contrast paint? Well the tinting of the underlying base color is supposed to be stronger with a contrast paint. But in both cases the color underneath can change the final shade once you put a wash/shade or contrast paint on top.

    To show this effect – and to help me decide on how to paint my Orks' skin – I decided to take some old Gretchin models (space goblins) that I collected from Warhammer 40,000 Second Edition boxed sets. (No one wanted Orks or Gretchin back then except me, so I picked them up for practically nothing. They were still laying around unpainted some 20+ years later.)

    I started by using Citadel Corax White spray paint, which is a cool off-white tending towards gray, to prime them. This is a recommended, and hence expensive, primer for those using contrast paints. I can tell you that it is a better primer than, say, acrylic inks when it comes to contrast paints. Acrylic inks can cause the contrast paints to bead, so if you are going to prime with that, you need to shoot it with matte varnish afterwards.

    I basically had three greens on hand to try out: Plaguebearer Flesh, Militarum Green, and Ork Flesh. There are at least three others, Dark Angels Green, Creed Camo, and Warp Lightning but my FLGS did not have them. If anything, Creed Camo is the one closest to my idea of what Ork skin color should look like, but I did not have access to it. (I could complain about COVID-19 closing down the shops, but honestly, if it were not for the closing of the shops I would probably not be painting.)

    I started with Plaguebearer Flesh alone, as an undershade to the other greens, and as an overshade to a brown (Aggaros Dunes).

    Paint combinations with Plaguebearer Flesh
    Next I tried Aggaros Dunes as an undershade to the three greens.

    Paint combinations with Aggaros Dunes
    Next I tried Militarum Green by itself.

    Paint Combinations with Militarum Green
    And finally I tried Ork Flesh by itself.

    Paint Combinations with Ork Flesh
    One of the things that I noticed is that certain paint combinations did really well when it came to smoothing out the colors, ending up much less blotchy than colors by themselves. Other combinations remained blotchy. I don't know if it was how I laid down the colors or, as I suspect, that the contrast paints with stronger pigments and covering power do not react well with other contrast paints.

    For Orks tending towards a yellowish skin color I preferred Plaguebearer Flesh over Aggaros Dunes. Neither of these contrast paints are particularly strong in their covering power.

    Best Yellow – Plaguebearer Flesh over Aggaros Dunes
    The best combination for Ork skin color tending towards green has to be Ork Flesh over Plaguebearer Flesh.

    Best Green – Ork Flesh over Plaguebearer Flesh
    Something about the Plaguebearer Flesh formulation smooths out Ork Flesh so that the latter is not so blotchy. Either that or I had a really good touch for once and got it just the way I like it. Given that my armor color is going to tend towards the lighter green color I am probably going to use the latter color combination for my Orks' skin color. If I were going to go with a single paint as the color, right now it would be Militarum Green. However, I suspect that once I see Creed Camo it will likely turn out to be a favorite.


    Let me know if you are not interested in seeing painting discussion. I know I am usually a gaming blog with an emphasis on rules reviews, but there are really four aspects of my hobby (making, painting, gaming, and gaming with computers) and I have been focusing on the latter two for a while now. I have shied away from painting for some time mostly because I feel like between my back and my eyesight I cannot accomplish very much volume and what I can accomplish is always pleasing to my own eye. (I am very critical of my painting because I used to paint very well for an amateur.)

    Painted my Ratmen (Skaven)

    $
    0
    0
    I was able to get another Warhammer Underworlds warband completed. Lest anyone think I am out of work, I am not. (I am very lucky in that regard. My wife, however, is a nurse at a hospital, as is my daughter. Everything still good on those fronts too.) I have just been focusing more on painting over tabletop, computer, or virtual gaming. (Shaun Travers burned me out for a week or so on the latter. I may have possibly burned him out too as I have not heard from him. Shaun, are you still out there?!)

    So, why all the painting? As I have probably said more than once, I have a tendency to rotate through my hobbies, of which gaming is only one (well, two, because I consider tabletop gaming and computer gaming separate and distinct, while virtual gaming is a variant of tabletop gaming). Painting miniatures and making them are two other hobbies. Clearly I am in "painting mode", which I have not been for quite some time.

    These figures had been partially painted twice before, along with being stripped twice. This time I primed them white and went to town with contrast paints.

    The first color is the bluish-gray used for the metals. This is the Space Wolves Gray color. As you can see it is a bit blotchy in color. The first time I used it I tried to even out the blotchiness by painting another coat. Then another. Several coats turns this paint into a very dark shade of bluish-gray. Because it has some medium in it that makes it thicken relatively quickly it is hard to soak up the pools of paint before it thickens. If it gets too thick then trying to soak up the excess paint breaks the surface of the paint, which looks even worse. I need to find a mix of paint and flow aid/gloss medium/gloss gel that will smooth out the pools on the flat areas while maintaining its ability to collect in the crevices, creating the contrast. As it stands, I like it as a bluish "non-metallic metal".


    You can see the chainmail and stonework were painted the same color, despite the former representing a different shade of non-metallic metal and the latter representing stone. That is the Basilicanum Gray contrast paint. This too is a very blotchy paint on flat surfaces. I think it works better for chainmail than it does for stone, but neither are really bad for tabletop standard. I think if you undercoated the chainmail with a true metallic, then used this gray, it would look better.

    The gild work on this next figure's helmet is one of the yellows in the contrast paint range. It is clearly too yellow for a gold, but I later found out that if you use the flesh color as a wash over it, it takes on a deeper golden tone. So I may go back and do that. That is one of the things I like about singly-based figures. In theory, you can always go back and add a little more detail later. In theory...


    I used the standard human flesh color for the flesh of the ratmen. I wanted the color of the tails to be a bit more distinct from the rest of the flesh, so I mixed the flesh color with the pink in a 1:1 ratio. That toned down the near-magenta look of the pink contrast paint.


    I wanted to make sure that my browns were distinctly different colors, so the flesh was a light red-brown, the fur a deeper red-brown, and the wood was a mid-brown to which I added a coat of yellow-brown on top. Again, another nice quality of some of the contrast paints is that they are weaker and make great glazes so you can apply colored filters and subtly change the final color value.


    A good example is the base of the figure above. The sewer grate is the same bluish-gray color of the armor and the flagstones are the previously mentioned gray, but I have used two shades of weak green as filters to spots in order to give the appearance of algae-covered stone.

    The final two colors used were the Gryphon Orange, for the cloth, and Snakebite Leather, which appears on the hood of this character.

    The orange is simply too blotchy to be used as what most people would use it for, representing cloth. If you use it for hair, well, it will be some pretty bright hair. Like dyed orange hair. As a cloth color, however, it just does not go on smooth enough, like the bluish-gray. Maybe more coats of the orange would not be a bad thing. I think it is one of those colors that simply need tweaking with either contrast medium, flow aid, or acrylic gel.


    Snakebite Leather used to be a classic yellowish-brown in the Citadel paint lineup that was great for leather (hence its name). Alas, they are no longer sold and the "replacement", Balor Brown, is not the same. (Or rather, no longer sold by Citadel. I hear that the same color is a part of the Coat D'Arms paint line.) It seems like if you slather the Snakebite Leather contrast paint on, in several coats, it has a quality much like the old paint of the same name, but I hate painting the same spot over and over to build up a color, so I need to find a formulation that fixes this contrast paint.

    All in all, I like them. I used to be able to do much better, using a much cleaner style. (Maybe someday I will post picture of my old miniatures, from 25+ years ago, but it might depress me.) But for what I am aiming for – tabletop ready troops – this is fine.

    Next Up

    This will probably be the last fantasy subject for a while. I have quite a collection of unpainted 15mm Classical Greeks – as in hundreds of them – and I am now very curious about painting them with contrast paints.

    Will they look okay? It is possible that they need deep creases in order to look better, but I won't know until I try.

    Will they be significantly faster to paint with contrast paints? Given that they have been sitting in a giant plastic tub for damn near a decade the significant factor is actually attempting to apply the paint.

    Can I make the right colors? I consider ancients sort of cheating in this regard because we have very few examples of the exact Pantone shade used in ancient times! 😁So I think pretty much any dull color I use will be good. You can further vary the shades by changing the primer color from white to light gray to beige to light blue and these will change the color values of the contrast paints as many of them tint the undershade.

    So, hopefully I do not burn out before I get that project started.

    Battle Systems Terrain

    $
    0
    0

    Like everyone I have been home a little more than usual (but not too much more, given I am this side of a shut-in) and I have been wondering why I have not been gaming as much as I think I would like. The more I thought about it the more I realized that when it comes to gaming, I have been a little too neglectful with the other hobby[1]: terrain making.

    For example, I have a lot of Warhammer 40,000 miniatures and have almost zero terrain for it, other than a few generic trees and hills. But that is about it. Most of my terrain is for 15mm figures, and more oriented towards WW II. (The roads, for example, have tank tread marks, so are generally unsuitable for earlier periods unless you just overlook it.) Second is cartoony wooden terrain for my homemade 42mm wooden soldiers. 

    Sometimes I feel like I should either get out of a lot of scales and periods, or get busy with making terrain. (I actually should do both, but let's not go there...)

    The FLGS (Isle of Games in Tucson, Arizona) was having a 25% off Christmas sale (30% for "Big Kahunas" like me[2]) so I decided to head the 75 miles there and see what I could get in the way of terrain.

    I saw the Battle Systems tabletop terrain sets on the shelf before, but I rarely gave it more than a glance. There was an open box once and it was printed cardboard, not plastic or MDF. It looked to be pretty flimsy cardboard at that. So I always passed it by.

    Well yesterday I did not pass it by. One thing I noticed that I had not before was that the box included a neoprene mat that acted as the board. I recently wrote to Alpha Terrain about their MDF products and they showed a setup on a mat and with bases that looked like floors and sidewalks that the buildings and walls were on. It turned out that all of that was for show and was not included in their set, nor could you apparently buy it. The Battle System kit appeared to be showing exactly what was in the box. I decided to give it a try. In fact I bought not only the Cyberpunk Core Set shown above, I bought the City Block Core Set and the Frontier Core Set.

    As the Cyberpunk Core Set was the smallest, and I was looking to play a scenario of Hardwired and maybe one of Chrome Hammer (the author of the latter is local), I decided to put that together first. Although this set makes a 2' by 2' table – a little small for 28mm figures – it is actually pretty adequate because the walls and such break up lines of sight really well, so this promises to be setup good for a close quarters battle scenario.

    The first thing I want to point out is that this is my setup, not promotional pictures from the website. Second, this is most, but not all, of what is included. There were some additional signage and gizmos that I was not really able to figure out how to incorporate (yet). More on that later.

    As you can see in the image above it has a nice number of walls and furniture. You are provided with extra straight, corner, t- and four-way intersection clips to connect the walls, so you are not limited to the setup shown on the back of the box. Further, Battle Systems sells additional walls and gubbins from this set so you can definitely expand beyond what you see. They even sell the mat.

    The detail of the printing is pretty good. Note the one thing I did was go around all of the edges and blacken them with a permanent marker. When I looked closer at the images on the box and the website I noticed that they painted them, using appropriate colors (red, for the neon sign, for example, and steel for the wall tops and edges). I may go back and do that.

    Here is a scene where my Tau have a Dark Eldar cornered. All in all it looks pretty good.

    As I was assembling everything I started to wonder if these were a little too ... small.  As you can see with my GW figures below they are actually scaled pretty well with them. The crate is about 1/2 body height, even with the thick bases. They would probably look a bit small for Space Marines, but hey ... Space Marines.

    They would look really well with the Star Wars figures from Imperial Assault. (I am not so sure about with the figures from Star Wars: Legion, which I also bought into.)

    In case you didn't notice, there is a square grid printed on the mat. They are 1" squares, so if you play games where not knowing the range is a thing... Me, I don't play those sorts of games. I love the grid and before I noticed it, I was considering putting dots on the mat to demark the grid. So one less thing to do.

    So, is it all pie in the sky? There are some minor issues, like a little bit of warping and wondering whether there will be wear and tear as I keep setting it up and tearing it down. But let me tell you, the ability to quickly get a board together like this was certainly worth the cost (about $75 for this set and $110 each for the other two sets). Again, Battle Systems has additional sets and individual parts so assuming that this holds up to my gaming, I can see getting more and gaming this genre more. So far I am impressed.

    Footnotes

    [1] One of the other things I have come to realize is that "gaming" is generally not a single hobby for most people. There is the miniature collecting hobby, the miniature painting hobby, the terrain making hobby, and the gaming hobby. I think the only people that get away with "just" gaming are those that show up for games at the hobby shop or your home, use your miniatures, and generally never know the rules.

    [2] I get that "Kahuna" and "Big Kahuna" are rankings that speak to the "Isle" theme, but I think the real definition is "a wise man", which isn't really accurate, given they add the label for big spenders. I think they use it instead of another island-themed term: whale.

    Review of Hardwired: Cyberpunk Espionage and Mayhem

    $
    0
    0

     I purchased the miniatures rules Hardwired: Cyberpunk Espionage and Mayhem some time ago, along with the expansion The Tsim Sha Tsui Expansion. These are by Patrick Todoroff, who also wrote Zona Alfa for Osprey. The description for the rules are:

    Corporate wars, shadow ops, cranial jacks, cyber-augmentations… you’ve been here before. You know how this goes.

    A table top war game set during the Corporate Wars of 2069 in the mega-city of New Kowloon.  Miniatures agnostic. 1 - 6 players, Co-op or Solo Mode. Made for 15mm - 28mm miniatures.

    Given my last post, you can probably guess where this is going...

    Overview

    Players have 4 Agents, which can be selected from 5 Specialization Protocols (SPs):

    • Ronin - ranged combat specialist
    • Razor - close combat specialist
    • Splicer - hacker and drone controller specialist
    • Sawbones - medic and support specialist
    • Shiver - psionic

    Think of an SP as an RPG "class".

    Although Agents can do actions from any specialty (exception: only Shivers can perform psionics), your SP will determine if you get a bonus die when trying to perform the action.

    That brings us to the core mechanic, which is that almost every action requires you roll a die and score a 4+ in order to succeed at that action. Want to move? You need to use an action and then roll a 4+ on your die. What to hit someone with your rifle? You need to use an action and then roll a 4+ on your die. Note that there are a few modifiers for most action types. For example, shooting at someone in cover would penalize you with a -2 to your roll.

    The second core mechanic is the number of actions you receive every turn. Each Agent starts with one free Move and three Actions every turn. As you become wounded, it removes the number of actions that Agent receives every turn and reduces the dice pool (described later). The enemy forces - called Hostile Security or H-SEC - get a number of actions based upon their Tier level. Tier 1 have one action, Tier 2 have two and Tier 3 have three actions.

    The third core mechanic is that each Agent gets a dice pool of a D6, D8, and D10 each turn. These dice are used to determine if you succeed (rolling 4+) at the action you are attempting. So that means you get one action using a D6, one using a D8, and one using a D10. Again, you need to roll a 4+ on that die in order to succeed at the action you are attempting. So if you use your D8 to shoot at an H-SEC, you need to roll a 4+ to hit them, otherwise it is a miss. Note that the Agent's free Move is not an "Action", so it does not need to roll for success (using a die).

    The reason you specified an SP for your Agent is because each SP has a bonus for certain actions. For example, the Ronin is a ranged combat specialist, so when choosing a Shoot action, rather than rolling one die (of whatever type selected) the Ronin would roll two of that die type. If either die succeeds, the action is successful. (Nothing special happens if both succeed.)

    H-SEC always use a specific die type based on their Tier for all of their actions. So a Tier 1 gets one action using a D6, Tier 2 gets two actions using D8 for each, and Tier 3 gets three actions each using a D10. (Ouch!)

    Finally, when it comes to combat and damage, Agents all have 3 Wounds, while all H-SEC have 1 Wound each. A successful attack, whether ranged or close combat, inflicts a single hit on the target. When a target is hit they get to make a Defense/Dodge roll to see if they can avoid the hit. Unavoided hits inflict a single wound. Once your wounds are down to 0, you are dead.

    That's the basics of the combat mechanics. The turn sequence is IGO-UGO with Agents always acting first. H-SEC forces get reinforcements every turn, with each wave of reinforcements always moving to cover on the turn of their arrival. Reinforcements escalate in deadliness, with turns 1 and 2 bringing on Tier 1 forces, turns 3 and 4 bringing Tier 2, and turns 5 and 6 bringing Tier 3 forces. (Games generally end after turn 6 is completed, so it forces the players into a sense of urgency to complete the mission and not dawdle.)

    Details

    So, with the core mechanics out of the way, let's get into the details and how these rules make them "appropriately flavored" for the cyberpunk genre. After all, it is more than just cool figures and gritty terrain.

    Skills

    Even though each Agent has a Specialization Protocol (SP, i.e. "class"), every Agent can pretty much do everything, except for psionics (which are limited to those characters that have that innate talent). Everyone can shoot, fight in hand-to-hand combat, hack, control drones, act as a medic, etc. It is just that some SPs are better than others at some of those actions than others (as indicated by receiving a bonus die when rolling for success). I feel like this reflects that Agents will have "skill chips" that allow them to perform tasks that "normals" might not be able to.

    CAPs

    Another representation of "skill chips" are Combat Augmentation Programs or CAPs. These are pre-installed, skill-specific pieces of software and hardware that all Agents have. Again, all SPs have access to all CAPs so an Agent can attempt to use any of them that they wish. Note that activating a CAP is an Action, so it takes time,  uses a die, and you must succeed on your die roll. As with actions, some SPs are better at certain CAPs than others, so when rolling for success they roll two die of the type chosen for the action.

    CAPs are divided into Cyber (where a Splicer gets a bonus), Combat (where a Ronin or Razor gets a bonus), Support (Sawbones), and Psionics (usable on my Shivers, which receive the bonus).

    Cyber CAPs cover things like infiltrating, shutting down, or asserting control over the enemy network, drones, and cyborgs. It also includes piloting remote drones.

    Combat CAPs cover things like targeting software, augmented reflexes, sub-dermal armor, and shields. All means of boosting ranged and close combat attacks or your defenses.

    Support CAPs cover adrenal boosts, medical skills to heal wounds, overwatch software, and the ability to give an action to another Agent.

    Psionics are limited to Shivers only. They have their own abilities that act as an overwatch skill, a mental attack on enemies that can kill, cause fear, or confusion, and a defense that makes the Shiver harder to target with attacks.

    One final note: although every Agent can try any and all CAPs during the course of a mission, each can only successfully use each one once per turn. You cannot, for example, successfully use targeting software twice and then on your third action shoot a target. You can successfully use different CAPs in the same turn, however.

    Equipment

    Before the start of every mission each Agent can change their equipment load-out. Every Agent has three equipment slots with gear taking anywhere from 1/2 to 2 slots. Equipment falls into the category of Cyber, Combat, and Support.

    Cyber equipment are essentially Intrusion Countermeasure Electronics (ICE) called Macros, and assist in infiltrating, overloading, or hijacking targets, or in piloting remote drones.

    Combat equipment is either Smart Ammo (better ranged attack), Monofilament Blade (better close combat attack), or Micro-Grenades (two one-use ranged attack with various effects).

    Support equipment are either drugs or drones. Drugs can either heal or boost you (but you subsequently crash when the effects wear off).

    Drones occupy two equipment slots, so you really have to want one, but it effectively gives the Agents another model to use, but it uses the drone controller's actions, so it is questionable about how useful it is. While controlling the drone the only thing the operator can do is their free Move every turn. Drones basically can, for every action given by the controller: move twice; move once and perform one other action; or perform two actions. So in one regard it is more efficient as you are spending one action by the controller to get two actions by the drone. There are various configurations of drone that you choose from before the mission starts. Each drone has two hardpoints with each hardpoint containing either a D8 weapon, a storage container with grenades and drugs, or Electronic Counter Measures (ECM) that helps everyone's attempts at hacking.

    Hacking

    Would it be cyberpunk if it did not have hacking?

    Any Agent can attempt to hack, with Slicers getting the bonus die. What exactly can be hacked seems to be a part of the scenario. For example, are the doors closed and simply need an Interact action to open them or do they need to be hacked to get them open? Can you hack the network and open them all at once? Are the H-SEC forces organic or cyborg?

    All H-SEC cyber-systems have a Security Rating of 1-3, with the higher numbers harder to hack. (Civilian systems are rated 0.) The rating is used as a negative modifier to your hacking roll (again, needing a 4+ to succeed).

    It should be noted that everything is networked to some degree and wireless to boot so an Agent can hack without range or line of sight restrictions as long as they are in the mission area.

    H-SEC A.I.

    Hardwired is meant to be played cooperatively (all players are playing Agents) or solo, so the H-SEC forces naturally need an A.I. or program to operate. The rules they follow are pretty simple.

    1. Engage the nearest visible enemy.
    2. Use cover whenever possible.
    3. Keep attacking until either they or you are dead.
    4. Prevent Agents from achieving their objective.

    Pretty simple and straightforward. Play them to the best of your ability while following those rules. Where two options are equal, you can easily roll a die to see which they choose.

    H-SEC forces actually all start off the board. Each turn they randomly spawn on two of the four access points defined in the scenario. Each spawn is either 2 or 3 models, of a Tier indicated by the turn. On the turn they spawn they only thing they can do is a free Move towards cover, no activation roll needed. (There is an exception for the final game turn, otherwise the last turn's reinforcements would be useless.)

    Scenarios

    There is 1 scenario and 5 mission starters (scenario ideas) included with the rules, in order to give you an idea of how to approach this genre as a miniatures game. The scenario, the Seraph Protocol, is a straightforward retrieval mission. "Move in, secure a VIP, eliminate any hostile forces, and exit the area with the asset unharmed." It gives the backstory, forces involved, a description of the mission area, objectives, and special scenario rules (like bring a Slicer to deactivate the cortex bomb in the VIP before you exit out of the mission area with him).

    Expansions

    The only expansion to date is The Tsim Sha Tsui Expansion although there was mention of a military-oriented (big skirmish?) expansion in a videocast.


    This supplement introduces new weapons, gear, and threats, as well as provides clarifications and variants for the original game.

    New Weapons

    As every agent is considered to be armed with a generic close combat and ranged weapon that have generic combat values, I am glad to see that this did not turn into an exhaustive list of weapons that basically have no real value in game terms. Instead, the author focused on creating new weapon categories that come with their own rules to cover all specific weapons of that category generically.

    The first weapon category is heavy weapons. Any and all Agents can carry one, but doing so has both benefits and penalties. Agent Drones cannot carry heavy weapons, although H-SEC Drones can. Rather than firing 18", heavy weapons fire 24". Because these weapons are heavier and bulkier, the model's Move action grants 3" of movement rather than 4" and they can no longer climb sheer surfaces without a ladder. Finally, heavy weapons use a 3" Blast template. If the hit roll is successful, all models touching or in the template must make a Defense/Dodge roll or take two wounds.

    The second weapon category is SAD or Short-ranged, Area effect, Direct fire weapons, i.e. shotguns, flechette rounds, flamers, and such. The weapon uses a 3" wide by 8" teardrop template. Everyone touching or within the template must make a Defense/Dodge roll or take one wound.

    New Equipment

    The new equipment includes Carbon Fiber Armor Plating, Active Mimetic Camouflage, Electronically Activated Adhesive Grips, a Miniature Holo-Generator, Variable Condition Optics System, Full Armored Tactical Suit, a Breaching Charge, a Resuscitation and Rapid-Healing Module, and a Nanite Fabricator. I'll let you imagine what these are, but you can see that now the author has considered armor and stealth a little more.

    New Threats

    In addition to the reinforcements that spawn every turn you can now face new threats in the form of sentry guns and turrets, surveillance masts, cyber-security nodes (ICE), and improved H-SEC troops using the new weapons indicated above.

    Campaign and Missions

    Included in the expansion is a mini-campaign of five linked missions. Wounds and Agents carry over from mission to mission, but as always, you can swap out your equipment load-out between each mission. At the start of mission 5 the action escalates, so you get a fifth Agent on your roster. If you lose an Agent there will be a replacement, but it will take one full mission to recruit them, so you will be down one man (for each lost Agent) for one game.

    As in the main rules the missions define the forces, constraints, objectives, and any special rules. No maps are provided only descriptions of the environment and terrain.

    Final Thoughts

    I found it interesting that for an "espionage" game, stealth plays no real role in this game system. Rule systems like Black Ops and Chrome Hammer have stealth as a core game mechanic, but not Hardwired. I can see grafting stealth mechanics from either of those two systems onto Hardwired for a better espionage experience. But that is for another blog post.

    Another aspect not touched upon are civilian forces, i.e. scientists, workers, bystanders (if the scenario takes place in public), and such. You can easily devise your own A.I. rules for them (run!), but I was surprised nonetheless.

    I like simple game mechanics and Hardwired definitely falls into that category. But just because the rules are simple it doesn't mean that there aren't difficult decisions to make. Given that you have six turns and four actions (one being a free Move) for each Agent every turn, this game is like Warhammer Underworlds in that this is all about managing a limited resource (Actions) as efficiently as possible. Given that the standard board size is 36" across and a standard Move is 4" that is a minimum of 9 Move actions if the scenario is to cross the board and exit off of the other side. As you have six free Move actions that means you must spend a minimum of three of your other actions, where success is governed by a die roll. Want to use your D6 to move those three times? Well, that is a 50% chance of success for each of those actions, so you better plan on burning six actions instead of three. That is now one action every turn, in addition to the free Move, assuming you move straight across.

    So, Hardwired has no shortage of meaningful decisions for the player to make that will greatly affect gameplay. Also, like deck-building games, the player has to consider their load-out of equipment and Agent SPs. (If playing a campaign, you decide the Agent SPs once, unless you have a deep roster.) Unlike deck-building games, however, the amount of time needed to decide on that load-out is far shorter and can easily be done in a few minutes prior to the game, rather than setting up a card deck the night before the game.

    Another aspect of a good game design that I like is not needing to constantly refer to the rulebook. Dice rolls are very easy in that the target number is 4+ and there are very few modifiers. The odds are determined by which die type you decide to throw rather than a long list of modifiers and model characteristics. The one areas where I can see getting stuck on is CAPs, because everyone can use any CAP at any time and there are just too many choices (12, unless using psionics then it is 16) to remember all of the details. Add in combat drugs, ICE, and gear variants on top of that and you probably have more than a few things to refer to. That said, the core of the game is activation efficiency and all of these other things use activations to get bonuses, so after you play a few games you realize that you cannot use these things except when you really need it.

    All in all, I like the rule system. If I have any skepticism it is whether I can think up a sufficient number of scenarios that have the right cyberpunk feel.

    Viewing all 135 articles
    Browse latest View live